The 2011 Honda Pilot owner’s manual is a vital resource, offering 574 pages of guidance. It details operation, safety, and maintenance for this mid-size SUV.
Accessing a free PDF version is possible, alongside official Honda download options, saving potential costs associated with purchasing a physical copy.
Overview of the Manual’s Contents
This comprehensive manual for the 2011 Honda Pilot meticulously covers all aspects of vehicle ownership. It begins with vital safety information, including seat belt usage and child restraint systems.
Detailed sections explain vehicle operation, from starting the engine to understanding dashboard instruments. Furthermore, it provides a robust maintenance schedule, outlining fluid checks and DIY procedures like oil changes.
If equipped, the navigation and audio systems receive dedicated coverage, including Bluetooth pairing instructions.
Importance of Reading the Owner’s Manual
Familiarizing yourself with the 2011 Honda Pilot’s owner’s manual is crucial for safe and efficient vehicle operation. It unlocks a complete understanding of your SUV’s features and capabilities.
Ignoring the manual can lead to improper use, potentially causing damage or compromising safety systems. Understanding maintenance schedules ensures longevity, while troubleshooting guides help address minor issues promptly.
Accessing the manual, even as a free PDF, empowers owners to maximize their Pilot’s performance and value.

Vehicle Identification
Locating your 2011 Honda Pilot’s Vehicle Identification Number (VIN) is essential. It’s key for service, warranty claims, and understanding vehicle certifications.
Vehicle Identification Number (VIN) Location
Determining the precise location of your 2011 Honda Pilot’s VIN is crucial for various vehicle-related processes. The VIN, a unique 17-character identifier, can typically be found on the driver’s side dashboard, visible through the windshield.
Additionally, it’s often located on the driver’s side doorjamb and within the vehicle’s registration and insurance documents. Knowing its location streamlines service appointments, warranty claims, and potential theft recovery efforts.
Understanding Vehicle Labels and Certifications
The 2011 Honda Pilot features several important vehicle labels and certifications providing crucial information about its manufacturing and compliance. These include the Monroney sticker detailing the vehicle’s price, fuel economy, and standard features.
Additionally, certification labels confirm adherence to safety and emissions standards. Understanding these labels ensures you’re aware of the vehicle’s specifications and regulatory compliance, aiding informed ownership and resale value.

Safety Information
The 2011 Honda Pilot manual emphasizes crucial safety precautions and warnings. It provides detailed instructions regarding proper seat belt usage and child restraint systems for all passengers.
Safety Precautions and Warnings
The 2011 Honda Pilot owner’s manual dedicates significant attention to safety. It outlines essential precautions to minimize risk while operating the vehicle, covering aspects like proper driving techniques and hazard awareness.
Warnings are prominently displayed, addressing potential dangers related to vehicle operation and maintenance. These cover everything from airbag deployment to fluid handling, ensuring occupants understand potential hazards and how to mitigate them.
Seat Belts and Child Restraints
The 2011 Honda Pilot owner’s manual provides detailed instructions regarding seat belt usage for all occupants. It emphasizes the importance of proper fastening and adjustment for optimal protection during a collision.
Specific guidance is given for child restraints, covering appropriate types based on age, weight, and height. The manual stresses adherence to local laws and regulations concerning child safety, ensuring the well-being of young passengers.
Operating Your Vehicle
The 2011 Honda Pilot manual details starting, stopping, and driving procedures. It explains all controls and instruments for a safe and informed driving experience.
Starting and Stopping the Engine
The 2011 Honda Pilot owner’s manual provides detailed instructions for safely starting and stopping the engine. It covers procedures for normal conditions, as well as potential issues like cold weather starting.
Understanding these steps is crucial for preventing damage and ensuring reliable operation. The manual emphasizes proper key usage and the importance of allowing the engine to idle correctly before shutting down.
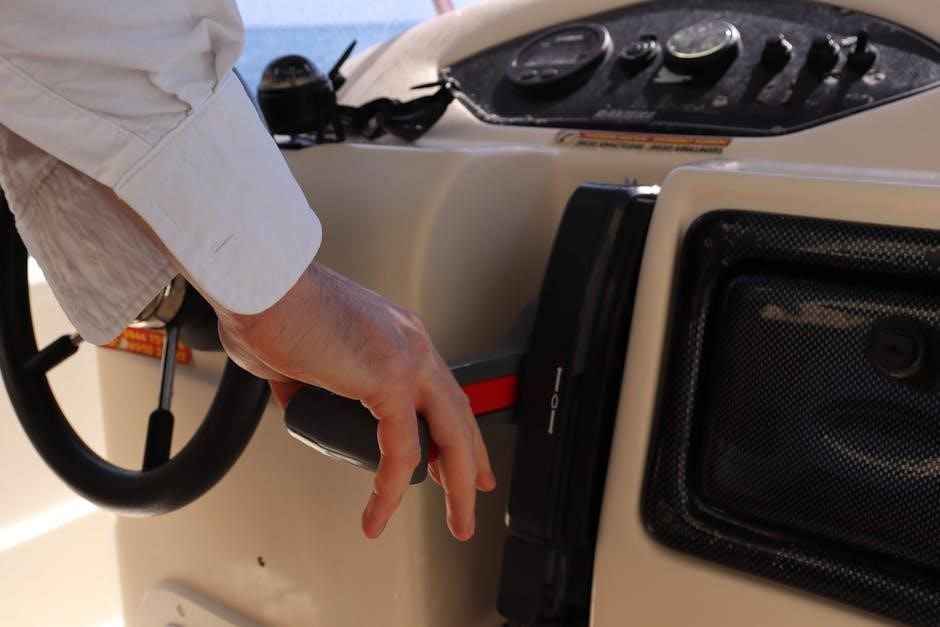
Driving Controls and Instruments
The 2011 Honda Pilot owner’s manual thoroughly explains all driving controls and instrument panel indicators. It details the function of steering, pedals, gear selection, and various switches within the cabin.
Understanding the instrument cluster is key; the manual clarifies warning lights, gauges, and information displays, ensuring drivers can monitor vehicle performance and address potential issues promptly and safely.
Maintenance Schedule
The 2011 Honda Pilot manual outlines recommended maintenance intervals. It covers essential fluid checks, replacements, and service procedures to maintain optimal vehicle condition and longevity.
Recommended Maintenance Intervals
The 2011 Honda Pilot’s maintenance schedule, detailed within the owner’s manual, is crucial for reliability. Regular inspections and servicing, like oil changes, are vital.
Specific intervals are outlined for various components, including fluids, filters, belts, and brakes. Following these recommendations ensures peak performance and prevents costly repairs, extending the vehicle’s lifespan significantly.
Fluid Checks and Replacements
Maintaining proper fluid levels is essential for the 2011 Honda Pilot’s operation. The owner’s manual details how to check engine oil, coolant, brake fluid, power steering fluid, and transmission fluid.
Regular replacement, at recommended intervals, prevents damage. Ignoring fluid maintenance can lead to overheating, corrosion, and component failure, impacting performance and safety.

DIY Maintenance Procedures
The 2011 Honda Pilot allows for several DIY tasks. Owners can change the engine oil and filter, and replace both the air filter and cabin air filter easily.
Changing Engine Oil and Filter
Performing oil changes on your 2011 Honda Pilot is a manageable DIY task. Service manuals, like those available in PDF format, provide detailed instructions for this procedure.
These guides outline the necessary tools, oil type, and filter specifications. Following these steps ensures proper lubrication and extends the engine’s lifespan, saving on professional service costs. Remember to dispose of used oil responsibly.
Replacing Air Filter and Cabin Air Filter
Maintaining optimal air quality within your 2011 Honda Pilot involves regularly replacing both the engine air filter and cabin air filter. Service manuals detail the location and replacement procedures for each.
Changing these filters improves engine performance and enhances the vehicle’s interior air quality. These are relatively simple DIY tasks, contributing to overall vehicle health and passenger comfort, as outlined in available PDF guides.

Troubleshooting Common Issues
The 2011 Honda Pilot manual aids in diagnosing warning lights and provides jump-starting procedures. Accessing repair manuals online can further assist with common problems.
Dealing with Warning Lights
The 2011 Honda Pilot owner’s manual is crucial for interpreting dashboard warning lights. These lights signal potential issues, ranging from minor maintenance needs to serious mechanical problems.
Consulting the manual helps determine the severity and appropriate action. Online service manuals, like those available in PDF format, offer expanded troubleshooting guidance for specific warning light codes, aiding in accurate diagnosis and repair.
Jump Starting Procedures
The 2011 Honda Pilot owner’s manual provides detailed jump starting instructions for a dead battery. It emphasizes safety precautions, including proper cable connection order – positive to positive, negative to ground.
Referencing the manual ensures correct procedure, preventing damage to the vehicle’s electrical system. Online service manuals supplement this with diagrams and further clarification for successful jump starts.

Detailed System Information
Service manuals offer in-depth insights into the 2011 Pilot’s engine and drivetrain. They cover specifications, repair procedures, and component overviews for informed maintenance.
Understanding the Engine Specifications
The 2011 Honda Pilot’s engine details are comprehensively covered in service manuals. These resources provide crucial information for repairs and maintenance, detailing the engine’s configuration and performance characteristics.
Specifically, these manuals outline the engine’s displacement, horsepower, torque, and compression ratio. Understanding these specifications is essential for diagnosing issues and performing accurate repairs, ensuring optimal vehicle operation and longevity.
Transmission and Drivetrain Overview
The 2011 Honda Pilot’s transmission and drivetrain are thoroughly explained in available service manuals. These resources detail the components and operation of the automatic transmission, crucial for understanding its function and potential issues.
Information includes details on the drivetrain configuration – front-wheel drive or all-wheel drive – and related components. This knowledge is vital for performing maintenance, troubleshooting, and ensuring smooth and reliable power delivery.

Navigation System (If Equipped)
The 2011 Pilot’s navigation system operation is covered in the owner’s manual. It includes instructions for use, map updates, and troubleshooting potential issues.
Navigation System Operation
The 2011 Honda Pilot’s navigation system, if equipped, offers a range of features detailed within the owner’s manual. Users can find instructions on destination entry, route calculation, and on-screen display interpretation.
The manual explains how to utilize voice command functionality, adjust settings for optimal viewing, and understand various map display options. It also provides guidance on utilizing the system’s search capabilities for points of interest.
Map Updates and Troubleshooting
The 2011 Honda Pilot owner’s manual provides information regarding map updates for the navigation system, though specific update procedures and costs are typically outlined separately by Honda.
Troubleshooting sections address common issues like GPS signal loss, incorrect route guidance, and system freezes. The manual suggests basic remedies, and directs owners to Honda dealerships for more complex problems or professional assistance.
Audio System Information
The 2011 Honda Pilot’s audio system features are detailed in the owner’s manual, including controls and Bluetooth pairing instructions for seamless connectivity.
Audio System Features and Controls
The 2011 Honda Pilot’s audio system boasts a range of features, comprehensively explained within the owner’s manual. Users can explore controls for AM/FM radio, CD player functionality, and auxiliary input options.
Detailed instructions cover volume adjustments, tuning, sound presets, and accessing various audio settings. The manual also clarifies operation of any integrated navigation system features linked to the audio output, ensuring optimal user experience.
Bluetooth Pairing and Connectivity
The 2011 Honda Pilot owner’s manual provides clear guidance on establishing Bluetooth connections. It details the pairing process with compatible smartphones and other devices, enabling hands-free calling and audio streaming.
Step-by-step instructions cover device discovery, PIN code entry, and troubleshooting common connectivity issues. The manual also explains how to manage paired devices and optimize Bluetooth performance for a seamless user experience.

Service Manual Resources
Online service manuals (2009-2011) are available via Dropbox and Honda Pilot forums. Haynes manuals also offer detailed repair guidance for DIY maintenance.
Links to Online Service Manuals (2009-2011)
Several online resources provide service manuals for the 2009-2011 Honda Pilot, often applicable to the 3rd Generation Odyssey as well. A PDF version can be found on Dropbox at dl.dropbox.com/u/88466655/09-11 Service Manual.pdf, sourced from Honda Pilot forums.
While not perfect in resolution or searchability, this manual offers valuable repair information, particularly regarding engine and transmission procedures, including detailed timing belt instructions.
Haynes Manual Availability
Haynes Manuals North America offers service and repair manuals specifically for the Honda Pilot. These workshop guides provide step-by-step instructions for DIY maintenance and repairs, catering to all skill levels.
Whether you’re a beginner or an experienced mechanic, a Haynes manual can assist with various tasks, ensuring proper vehicle upkeep and addressing potential issues effectively and safely.

Downloading the 2011 Honda Pilot Owner’s Manual
Official Honda provides download options, and free PDF manuals are readily available online. You can access the 2011 Pilot’s manual digitally for convenience.
Official Honda Manual Download Options
Honda offers official avenues for accessing the 2011 Pilot owner’s manual, though a cost of approximately $50 may be incurred for purchasing a digital or physical copy directly from them.
These official resources ensure you receive the most accurate and up-to-date information regarding your vehicle’s operation and maintenance, directly from the manufacturer. Explore Honda’s official website for details and purchasing options.
Free PDF Manual Availability
Fortunately, a free PDF version of the 2011 Honda Pilot owner’s manual is readily available online. Resources like various forums and document-sharing platforms host the 574-page manual for download.
However, exercise caution when downloading from unofficial sources to ensure file safety and integrity. This provides a cost-effective alternative to purchasing directly from Honda.
Understanding Warranty Information
The 2011 Honda Pilot’s warranty details coverage specifics and claim procedures. Reviewing this section is crucial for understanding your vehicle’s protection and rights.
Warranty Coverage Details
The 2011 Honda Pilot’s warranty provides coverage for defects in materials and workmanship. This includes components like the powertrain, electrical system, and corrosion protection.
Specific timeframes and mileage limits apply to each coverage area. Understanding these details is essential for knowing what repairs are covered and for how long. Review the owner’s manual for precise terms.
Certain items, like wear-and-tear parts, may not be included in the standard warranty.
Warranty Claim Procedures
To initiate a warranty claim for your 2011 Honda Pilot, contact an authorized Honda dealership. Schedule a service appointment and clearly explain the issue you’re experiencing.
Provide your vehicle identification number (VIN) and proof of regular maintenance. The dealership will diagnose the problem and determine if it’s covered under warranty.
Ensure all documentation is complete for a smooth claim process.