Clue: High School Edition Script PDF ― A Comprehensive Guide
This guide provides essential information regarding the Clue: High School Edition script in PDF format, focusing on legal acquisition, copyright details, and performance rights.
Understanding these aspects is crucial for any high school drama program considering a production of this popular comedic mystery.
What is “Clue: High School Edition”?
Clue: High School Edition is a stage adaptation of the beloved board game and 1985 film, Clue. Specifically tailored for secondary school performance groups, this version maintains the comedic mystery while adjusting content for a younger cast and audience.
The play revolves around six guests at a remote mansion, embroiled in a hilarious whodunit. It’s a popular choice for high school productions due to its engaging plot, ensemble cast, and opportunities for creative staging. The script, often sought in PDF format, details the entire performance.
Availability of the Script in PDF Format
The Clue: High School Edition script in PDF format is not widely available for free download due to copyright restrictions. While sites like Scribd host versions, these often represent previews or unauthorized uploads.
A complete, legally obtained PDF is primarily accessible through purchase from authorized vendors. Obtaining a legitimate copy ensures adherence to copyright law and supports the playwrights and licensing organizations involved in the production.
Where to Legally Obtain the Script PDF
The primary and most reliable source for a legal PDF copy of the Clue: High School Edition script is Playscripts, Inc. Their website offers the script for purchase, ensuring you receive an authorized version.
Other theatrical licensing companies may offer it, but Playscripts is the official distributor. Purchasing directly supports the creators and guarantees a complete, legally sound script for your production needs.
Playscripts, Inc. ― The Official Source

Playscripts, Inc. stands as the definitive source for obtaining the Clue: High School Edition script PDF. They handle all licensing and royalty arrangements directly, ensuring compliance with copyright regulations.
Their website (playscripts.com) provides a secure platform for purchase and offers detailed information regarding performance rights, restrictions, and necessary permissions for a legal production.
Copyright and Performance Rights
The Clue: High School Edition script is protected by strict copyright laws. All rights are reserved to the authors and licensing agency, Playscripts, Inc. Any public performance necessitates obtaining prior written permission and fulfilling royalty obligations.
Unauthorized reproduction, alteration, or distribution of the script constitutes copyright infringement with potential legal ramifications.
Understanding Copyright Restrictions
Copyright restrictions for Clue: High School Edition are comprehensive. Alterations to the script, including cuts or additions, are generally prohibited without explicit permission from Playscripts, Inc.
The authors’ creative integrity must be maintained. Proper credit to the playwrights and copyright holders is mandatory in all programs, promotional materials, and announcements related to the production.
Royalties and Licensing Fees
Performing Clue: High School Edition requires securing a license and paying associated royalties to Playscripts, Inc. These fees are dependent on factors like seating capacity and the number of performances.
Royalty payments grant the high school the legal right to stage the play. Failure to obtain proper licensing constitutes copyright infringement and carries significant legal consequences.
Required Permissions for Performance
Prior written permission from Playscripts, Inc. is absolutely mandatory before any performance of Clue: High School Edition. This involves submitting an application and receiving approval.
The application process ensures adherence to copyright regulations and proper royalty payment. Unauthorized performances are strictly prohibited and can lead to legal action, emphasizing the importance of compliance.
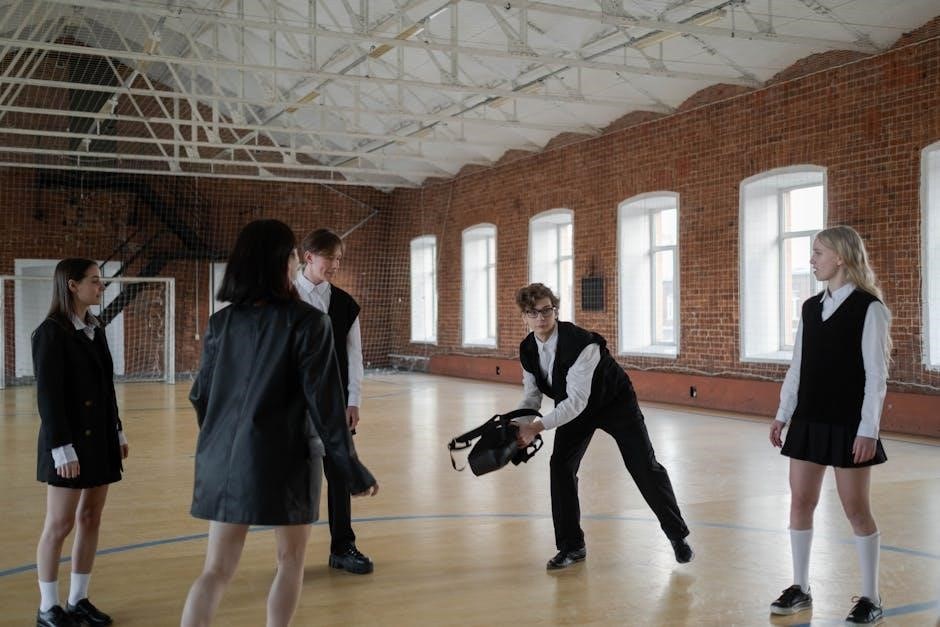
Key Characters in the High School Edition
The play features a colorful cast of characters, each with a unique motive and suspicious background. These include Miss Scarlet, Colonel Mustard, Mrs. White, Mr. Green, Mrs. Peacock, and Professor Plum.
Additionally, roles like Wadsworth the butler, Yvette the maid, and the Motorist add to the comedic intrigue, driving the plot forward in this classic whodunit.
Differences Between the Original and High School Editions
The High School Edition of Clue is specifically adapted for younger performers and audiences. This version generally features adjusted language, removing potentially mature content present in the original stage production.
While maintaining the core mystery and humor, the HS edition ensures appropriateness for school settings, making it accessible for student participation and performance.
Commonly Searched Script Sections
Drama teachers and students frequently seek specific scenes from the Clue: High School Edition script. Popular requests include the opening scene, establishing characters and the mysterious setting, and the final revelation scene, unveiling the murderer and motive.
These sections are vital for audition preparation, blocking rehearsals, and understanding the play’s comedic timing and dramatic structure.
The Opening Scene
The opening scene of Clue: High School Edition is crucial for setting the tone and introducing the eccentric characters. It establishes the stormy night, the isolated mansion, and the initial gathering of guests, each with a hidden past.
This scene heavily relies on comedic timing and character interaction, making it a popular focus for early rehearsals and scene study.
The Final Revelation Scene
The final revelation scene in Clue: High School Edition is a whirlwind of accusations and surprising twists. Multiple endings are possible, adding to the comedic effect and requiring careful staging and actor coordination.
This scene demands precise delivery of lines and physical comedy, culminating in the unmasking of the murderer and the resolution of the mystery.
Troubleshooting PDF Issues
If you encounter problems opening or viewing the Clue: High School Edition script PDF, ensure you have the latest version of Adobe Acrobat Reader or a compatible PDF viewer installed.
Try downloading the file again, clearing your browser cache, or contacting Playscripts, Inc. support for assistance with corrupted files or access issues.
Alternatives to Purchasing the Script
While obtaining the script legally from Playscripts, Inc. is highly recommended, some schools may explore library loans or inter-school sharing agreements.
However, these options must always adhere to copyright restrictions and performance rights agreements. Unauthorized copying or distribution remains illegal and unethical, potentially leading to severe consequences.
Legal Consequences of Unauthorized Script Use
Infringing on the copyright of Clue: High School Edition carries significant legal risks. Unauthorized reproduction, distribution, or performance can result in substantial financial penalties and legal action by Playscripts, Inc.
Schools and individuals could face lawsuits, impacting funding and reputations. Strict adherence to copyright law is paramount to avoid these serious repercussions.
Resources for High School Drama Programs
Playscripts, Inc. offers comprehensive support for educators staging Clue: High School Edition, including performance licenses and script materials. Additional resources include educational theatre associations and online forums.
These platforms provide valuable networking opportunities, production advice, and access to workshops focused on legal compliance and successful high school theatre productions.
This guide details obtaining the Clue: High School Edition script PDF, covering legal sources, copyright restrictions, and performance rights essential for productions.

Clue: High School Edition is an adaptation of the classic murder mystery game and film, specifically tailored for performance by secondary school drama programs.
It retains the humor and suspense of the original while offering adjusted content suitable for younger performers and audiences. The play centers around a dinner party gone awry, with guests and staff becoming suspects in a hilarious whodunit. The script provides a framework for an engaging and entertaining theatrical experience.
The Clue: High School Edition script is primarily available in PDF format through authorized vendors, ensuring legal access and supporting the rights of the creators.
While unofficial sources may exist, obtaining the script directly from Playscripts, Inc. guarantees a legitimate copy. This digital format allows for easy distribution to cast and crew, facilitating rehearsals and production planning. PDF availability streamlines the process for schools.
The primary and legally sound source for the Clue: High School Edition script PDF is Playscripts, Inc. Their website offers a secure platform for purchase and download.
Avoid unauthorized websites or file-sharing platforms, as these often distribute copyrighted material illegally. Purchasing directly from Playscripts, Inc. ensures you receive a legitimate copy and supports the playwrights and licensing company.
Playscripts, Inc. is the exclusive licensing agent for Clue: High School Edition, offering the official script PDF for purchase. They handle all royalty payments and performance permissions.
Their website provides detailed information regarding licensing fees, available performance dates, and the necessary steps to secure rights for your school production. Directly engaging with Playscripts, Inc. guarantees a legally compliant and supported theatrical experience.
The Clue: High School Edition script is protected by copyright law, with all rights reserved to the authors and Playscripts, Inc. Any public performance requires prior written permission and payment of royalties.
Unauthorized reproduction, alteration, or distribution of the script is strictly prohibited and carries legal consequences. Proper licensing ensures compliance and supports the creators of this engaging theatrical work.

Copyright restrictions for Clue: High School Edition are comprehensive, safeguarding the integrity of the play. Alterations to the script, including changes to dialogue or staging, are generally not permitted without express written consent.
This protection extends to all aspects of the work, ensuring the author’s vision remains intact during any performance or adaptation. Strict adherence is legally required.

Performing Clue: High School Edition necessitates the payment of royalties and licensing fees to Playscripts, Inc. These fees are determined by factors such as seating capacity and the number of performances.
Securing a license ensures legal compliance and supports the playwrights. Failure to obtain proper licensing constitutes copyright infringement, potentially leading to significant legal repercussions and penalties.
Prior written permission from Playscripts, Inc. is absolutely essential before staging Clue: High School Edition. This permission is obtained through a formal licensing agreement, outlining the terms of performance.
The agreement details acceptable modifications, crediting requirements, and royalty payment schedules. Unauthorized performances are a direct violation of copyright law and are strictly prohibited.
The cast features iconic characters like Wadsworth the butler, and the suspicious guests: Miss Scarlet, Colonel Mustard, Mrs. White, Mr. Green, Mrs. Peacock, and Professor Plum. Each character harbors secrets and potential motives.
The script provides detailed character breakdowns, allowing for diverse casting choices within a high school drama program, bringing these colorful personalities to life on stage.

The High School Edition of Clue is specifically adapted for younger performers, often featuring adjusted language and content to suit a school environment.
While maintaining the core mystery and humor, potentially sensitive themes are toned down, ensuring appropriateness for student actors and audiences. The script aims for accessibility without sacrificing the play’s comedic essence.
Drama teachers and students frequently seek specific scenes from the Clue: High School Edition script. Popular requests include the hilarious opening scene, establishing characters and the mysterious setting.
The climactic final revelation scene, where the murderer is unveiled, is also heavily searched. These sections are vital for audition preparation, scene study, and understanding the play’s structure.
The Clue: High School Edition opening scene immediately establishes the play’s comedic tone and introduces the eccentric guests. It’s a fast-paced sequence filled with character quirks and foreshadowing of the evening’s events.
This section is often sought for audition material, showcasing comedic timing and character work. The script details the initial interactions and sets the stage for the mystery to unfold.
The Clue: High School Edition final revelation scene is a whirlwind of accusations and dramatic reveals. Multiple endings are provided within the script, offering flexibility for different performances and ensuring a unique experience each time.
This section is crucial for understanding the script’s structure and comedic timing. It’s often studied for its clever writing and the interplay between characters as the mystery concludes.
If encountering problems with the Clue: High School Edition script PDF, ensure you have the latest Adobe Acrobat Reader installed. Common issues include formatting errors or inability to open the file.
Try downloading the PDF again from Playscripts, Inc. If problems persist, contact their support team for assistance. Clearing your browser cache may also resolve display issues.
While purchasing directly from Playscripts, Inc. is recommended, some schools explore library loans or inter-school sharing agreements. However, these options must still adhere to copyright regulations and royalty payment requirements.

Unauthorized sharing or reproduction of the PDF is illegal. Consider seeking grants or fundraising to cover the script’s cost, ensuring a legitimate acquisition.

Copyright infringement carries significant legal risks. Unauthorized reproduction, distribution, or performance of the Clue: High School Edition script can lead to substantial financial penalties and legal action by Playscripts, Inc. and the copyright holders.
Schools and individuals face potential lawsuits, impacting funding and reputations. Strict adherence to licensing agreements is paramount to avoid these severe consequences.
Playscripts, Inc. offers comprehensive support for educators producing Clue: High School Edition, including detailed performance guides and licensing assistance. Educational Theatre Association (EdTA) provides valuable resources for all aspects of high school theatre production.
Additionally, online forums and theatre communities offer peer support and advice for navigating the complexities of staging a play and securing necessary permissions.