costco spring rolls cooking instructions

Costco spring rolls are a convenient and delicious option, offering a crispy texture and versatile flavors. This guide provides easy cooking methods and expert tips for perfect results every time.

Overview of Costco Spring Rolls

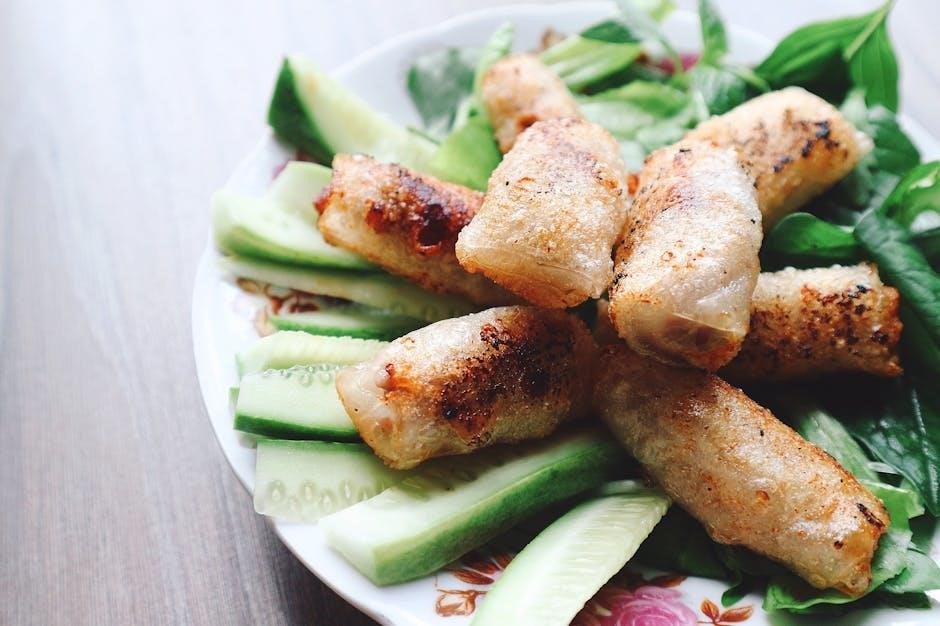
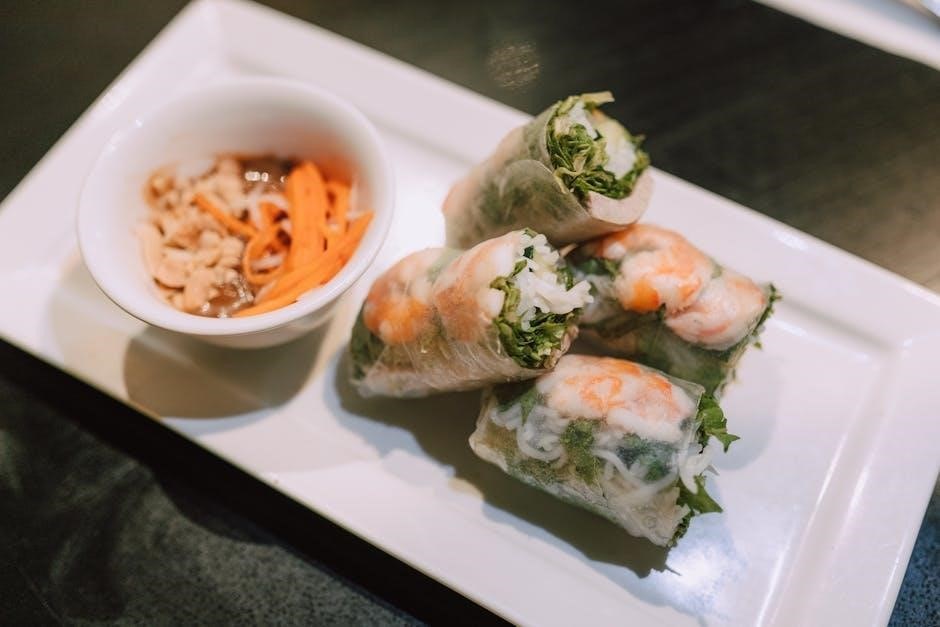
Costco spring rolls, such as the Vegetable Spring Rolls from Royal Asia, are a popular frozen convenience food. They feature a light, crunchy pastry wrapper filled with ingredients like jicama and edamame, offering a delicious and versatile snack or appetizer. These rolls are designed to be easily cooked at home, providing a crispy texture when prepared correctly. They come with dipping sauces, such as ginger and soy, enhancing their flavor profile. Available in the freezer section, Costco spring rolls are a quick and tasty option for busy households, perfect for snacks, meals, or entertaining guests.

Importance of Proper Cooking Instructions

Proper cooking instructions are essential for achieving the perfect texture and flavor in Costco spring rolls. Incorrect cooking methods can result in undercooked or overcooked rolls, leading to a soggy or burnt texture. Following guidelines ensures even cooking, preventing greasiness and maintaining crispiness. Proper techniques also enhance food safety by ensuring the rolls reach a safe internal temperature. Additionally, correct cooking preserves the integrity of the filling and wrapper, delivering the best taste experience. By adhering to recommended instructions, you can enjoy a delicious, crispy snack that meets your expectations. This guide provides clear steps to help you achieve perfection every time;

Objective of the Article

This article aims to provide a comprehensive guide for cooking Costco spring rolls to perfection. Whether you prefer oven baking, air frying, or deep frying, this guide offers step-by-step instructions for each method. The objective is to help you achieve crispy, flavorful spring rolls every time, while ensuring food safety and optimal texture. By following the tips and techniques outlined, you’ll be able to prepare delicious spring rolls effortlessly. This guide also covers essential preparation steps, storage advice, and troubleshooting tips to address common cooking challenges. The goal is to empower you with the knowledge to enjoy Costco spring rolls at their best.

Cooking Methods

Costco spring rolls can be cooked using various methods, each offering a unique texture and flavor. Popular techniques include oven baking, air frying, deep frying, and pan frying for crispy results.

Oven Cooking Instructions

Preheat your oven to 375°F (190°C). Place Costco spring rolls on a baking pan in a single layer, ensuring they don’t overlap. Bake for 18-20 minutes, flipping halfway through, until golden brown and crispy. For best results, preheat the oven fully before cooking. This method ensures even cooking and a crunchy texture without added oil. Keep an eye on them during the last few minutes to avoid overcooking. Once done, let them cool slightly before serving. This oven method is a healthier alternative to deep frying while still delivering delicious, crispy spring rolls.

Air Fryer Cooking Instructions

Preheat the air fryer to 375°F (190°C). Place Costco spring rolls in a single layer, leaving space between them for even cooking. Cook for 8-10 minutes, shaking the basket halfway through. For crisper results, increase the temperature to 400°F (200°C) and cook for an additional 2-3 minutes. Ensure not to overcrowd the basket, as this can prevent even cooking. Once golden brown and crispy, remove and serve immediately. This method yields a deliciously crispy texture with minimal oil, making it a healthier alternative to deep frying while maintaining flavor and crunch.

Deep Frying Instructions

For deep frying Costco spring rolls, heat vegetable or peanut oil in a deep pot to 350°F (175°C). Carefully add spring rolls in batches to avoid overcrowding. Fry for 3-4 minutes on each side until golden brown and crispy. Do not overcrowd the pot, as this can lower the oil temperature and result in greasy rolls. Once cooked, remove with a slotted spoon and place on paper towels to drain excess oil. Serve immediately for the best texture. Adjust oil temperature if necessary to prevent burning. Deep frying yields a crunchy exterior and a tender interior, perfect for dipping in your favorite sauce.

Pan Frying Instructions

Pan frying Costco spring rolls is a great way to achieve crispy results. Heat about 1-2 inches of vegetable or peanut oil in a skillet over medium heat until it reaches 350°F (175°C). Carefully place the spring rolls in a single layer, avoiding overcrowding. Cook for 4-5 minutes on each side, or until golden brown and crispy. Flip gently to prevent breaking. Repeat in batches if necessary. Remove with a slotted spoon and drain on paper towels to remove excess oil. Serve hot with your favorite dipping sauce. Pan frying offers a crispy exterior and tender interior, perfect for a satisfying snack or appetizer.

Cooking Preparation

Proper preparation ensures optimal results. Thaw frozen spring rolls slightly, preheat your chosen appliance, and arrange them in a single layer for even cooking and crisping.

Thawing Frozen Spring Rolls

Thawing frozen spring rolls is essential for even cooking. Place them in the refrigerator overnight or thaw at room temperature for a few hours. Avoid microwaving, as it can cause uneven thawing and affect texture. Once thawed, gently pat dry with paper towels to remove excess moisture, ensuring crispiness during cooking. Proper thawing prevents sogginess and helps achieve the perfect texture. For best results, follow thawing instructions carefully before proceeding with your preferred cooking method.

Preheating the Cooking Appliance

Preheating your cooking appliance is crucial for achieving crispy and evenly cooked spring rolls. For oven cooking, preheat to 375°F (190°C) or 400°F (200°C) depending on the method. If using an air fryer, set it to 375°F (190°C) and let it preheat for 2-3 minutes. For pan frying, heat oil in a skillet over medium-high heat until it reaches the optimal temperature for frying. Ensure the appliance is fully preheated before adding the spring rolls to prevent sticking and promote even browning. Proper preheating helps in achieving the perfect crispiness and texture for your Costco spring rolls.

Arranging Spring Rolls for Cooking

Properly arranging Costco spring rolls is essential for even cooking and crispiness. Place them in a single layer on a baking sheet, air fryer basket, or skillet, ensuring they do not overlap. For oven and air fryer cooking, line the surface with parchment paper to prevent sticking. In a pan, arrange the spring rolls in a way that allows enough space for even frying. Avoid overcrowding, as this can lead to steaming instead of crisping. Proper arrangement ensures each spring roll cooks uniformly, achieving the desired texture and flavor. This step is vital for perfect results every time.

Cooking Tips

Preheat your cooking appliance to ensure even cooking. Pat dry spring rolls for crispiness. Use a small amount of oil for frying. Avoid overcrowding to prevent steaming. Maintain consistent temperature for perfect results.

Achieving Crispy Texture

To achieve a crispy texture, preheat your cooking appliance thoroughly. Pat dry the spring rolls with a paper towel to remove excess moisture. Use a small amount of oil for frying or spritz lightly before air frying. Avoid overcrowding the pan or basket, as this can lead to steaming instead of crisping. Cook at the recommended temperature and flip halfway through to ensure even browning. For extra crispiness, increase the heat slightly during the last few minutes of cooking. These tips will help you enjoy perfectly crispy Costco spring rolls every time, whether baked, fried, or air-fried.

Preventing Spring Rolls from Sticking

To prevent spring rolls from sticking, ensure your cooking surface is properly preheated and lightly oiled or sprayed with cooking spray. For pan or air fryer cooking, arrange the spring rolls in a single layer, leaving space between each roll to allow even cooking. Avoid overcrowding, as this can cause them to stick together. If baking, line the baking sheet with parchment paper or a silicone mat. Lightly brushing the spring rolls with oil before cooking can also help prevent sticking and promote crispiness. These simple steps ensure your spring rolls cook evenly and remain intact for a perfect texture.

Maintaining Even Cooking

Maintaining even cooking is crucial for achieving perfectly crispy spring rolls. Always preheat your cooking appliance to the recommended temperature before adding the spring rolls. Arrange them in a single layer, ensuring they are not overcrowded, as this can lead to uneven cooking. For methods like air frying or baking, flip or rotate the spring rolls halfway through the cooking time to ensure both sides cook evenly. When pan-frying, stir occasionally to prevent burning. Monitoring the cooking process and adjusting time as needed will help ensure consistent results. Even cooking guarantees a crispy exterior and a well-cooked interior for every spring roll.

Serving Suggestions

Costco spring rolls are best served hot with a variety of dipping sauces, such as sweet chili or soy sauce, for enhanced flavor; They make great snacks or appetizers for any occasion.

Recommended Dipping Sauces

Costco spring rolls pair perfectly with a variety of dipping sauces to enhance their flavor. Sweet chili sauce, soy sauce, and ginger-based dips are popular choices. For added convenience, some Costco spring roll packages include complementary dipping sauces. Thai Kitchen Sweet Red Chili Sauce is a fan favorite, offering a sweet and spicy kick. Bibigo, a well-known brand, also provides delicious options that complement the spring rolls’ crispy texture. Experimenting with different sauces can elevate the snacking experience, making each bite more enjoyable and tailored to your taste preferences.

Pairing with Other Dishes

Costco spring rolls are versatile and can be paired with a variety of dishes to enhance your meal. They make an excellent appetizer or side dish, complementing Asian-inspired meals like stir-fries or noodle dishes. For a light lunch, try pairing them with a fresh salad or a bowl of soup. Spring rolls also work well as part of a wrap or sandwich for added crunch. Their crispy texture and savory flavor make them a great addition to sushi or dumpling platters. Whether served as a snack or part of a larger meal, they add a delicious and convenient touch to any setting.

Garnishing Ideas

Elevate your Costco spring rolls with creative garnishes that enhance their appeal. Fresh cilantro or mint leaves add a bright, refreshing touch, while thinly sliced green onions or grated carrots provide a pop of color. For added texture, sprinkle toasted sesame seeds or chopped peanuts. A drizzle of sweet chili sauce or soy sauce can also serve as a decorative element. Consider arranging the spring rolls on a bed of shredded lettuce or serving them with a side of pickled vegetables for a more polished presentation. These simple garnishes transform a simple snack into a visually appealing and flavorful dish.

Storage and Reheating

Store cooked spring rolls in an airtight container in the fridge for up to 3 days. Freeze for up to 2 months. Reheat in the oven at 350°F for 5-7 minutes or in the air fryer at 300°F for 3-4 minutes until crispy.

Storing Cooked Spring Rolls

To maintain freshness, store cooked spring rolls in an airtight container in the refrigerator for up to 3 days. For longer storage, place them in a freezer-safe container or bag and freeze for up to 2 months. Ensure the container is sealed tightly to prevent moisture and freezer burn. When reheating, preheat your oven or air fryer to crisp them up again. Avoid leaving cooked spring rolls at room temperature for extended periods to ensure food safety. Proper storage helps preserve their crispy texture and flavor for future enjoyment.

Reheating Leftovers

Reheating Costco spring rolls can be done in the oven, air fryer, or pan. For oven reheating, preheat to 350°F (175°C) and bake for 5-7 minutes until crispy. In the air fryer, reheat at 300°F (150°C) for 3-5 minutes, shaking halfway. For pan reheating, heat a small amount of oil over medium heat and cook for 2-3 minutes on each side until golden. Avoid microwaving to prevent sogginess. Ensure spring rolls are evenly spread to maintain crispiness. Reheat only what you need, as multiple reheats can affect texture. Serve immediately for the best flavor and texture.

Freezing Cooked Spring Rolls

Cooked spring rolls can be frozen for later use, but it’s important to follow proper steps to maintain their texture. Allow the rolls to cool completely before freezing to prevent moisture buildup. Place them in an airtight container or freezer bag, pressing out as much air as possible. Store in the freezer at 0°F (-18°C) for up to 3 months. When reheating, bake or air fry at a lower temperature (300°F or 150°C) for a shorter time to avoid overcooking. Freezing is a great way to preserve leftovers while keeping them crispy and flavorful for future meals.

Safety and Precautions

Always handle hot spring rolls with care to avoid burns. Never leave cooking appliances unattended, and ensure spring rolls are fully cooked to prevent foodborne illness.

Handling Hot Spring Rolls

When handling hot spring rolls, always use tongs or a slotted spoon to avoid direct contact with the crispy, hot surface. Place them on a paper towel-lined plate to drain excess oil and cool slightly. Never touch spring rolls immediately after cooking, as they can cause burns. Allow them to rest for a few minutes before serving. Use oven mitts or tongs when transferring from the air fryer or oven to a serving dish. Proper handling ensures safety and prevents accidents while maintaining the spring rolls’ crispy texture and flavor.

Avoiding Overheating

Avoiding overheating is crucial to prevent Costco spring rolls from burning or becoming overly crispy. Monitor the temperature and cooking time closely, especially in the air fryer or oven. Overheating can cause the spring rolls to darken excessively and lose their flavor. To prevent this, ensure even air circulation in the air fryer by not overcrowding the basket. When pan-frying, adjust the heat to medium-low and flip frequently. For oven cooking, check halfway through the recommended time and shake the pan gently. Proper monitoring ensures a golden, crispy texture without burning, resulting in a delicious and balanced flavor.

Ensuring Food Safety

Ensuring food safety when cooking Costco spring rolls is essential to avoid contamination and foodborne illness. Always thaw frozen spring rolls safely by refrigerating them overnight or thawing in cold water. Never thaw at room temperature. Cook spring rolls to the recommended temperature to ensure food safety. Use a food thermometer if possible. Handle hot spring rolls with care to prevent burns. Store leftovers promptly in a sealed container and refrigerate within two hours of cooking; Reheat leftovers to an internal temperature of 165°F (74°C) for safety. Proper handling and storage ensure a safe and enjoyable dining experience.

Troubleshooting Common Issues

Common issues include spring rolls not crisping, uneven cooking, or excessive greasiness. Adjust cooking times, ensure even spacing, and pat dry excess moisture for better results.

Why Spring Rolls May Not Crisp

Spring rolls may not crisp due to insufficient preheating, overcrowding, or excess moisture. Ensure the cooking appliance is preheated, pat dry any moisture, and avoid overlapping rolls for even crisping.

Fixing Undercooked or Overcooked Spring Rolls

If spring rolls are undercooked, increase cooking time by 2-3 minutes and check until crispy. For overcooked rolls, reduce heat or cooking time next batch. Ensure even cooking by flipping halfway. Pat dry excess moisture before cooking to prevent sogginess. Adjust temperature or timing based on your appliance. Keep an eye during the last few minutes to avoid burning. Air fryers and ovens may require slight adjustments for consistent results. Properly preheating and arranging rolls evenly also helps achieve the perfect crispiness without overcooking.

Addressing Greasiness

Greasiness can be minimized by cooking spring rolls in the air fryer or oven, which uses less oil. Pat dry excess moisture before cooking to reduce oil absorption. For pan or deep frying, use the right oil temperature (350°F) to prevent absorption. Drain cooked rolls on paper towels. Avoid overcrowding the cooking surface, as this can lead to steaming instead of crisping. Lightly spraying with oil before cooking can enhance crispiness without excess grease. Proper ventilation while cooking also helps reduce oiliness. These methods ensure a crispy texture with minimal greasiness, making your spring rolls more enjoyable and less messy.

Costco spring rolls offer a convenient and delicious meal solution. With various cooking methods and expert tips, you can achieve perfectly crispy and flavorful results every time.

Cooking Costco spring rolls is straightforward with the right techniques. For crispy results, preheat your oven or air fryer, and ensure even cooking by arranging rolls in a single layer. Avoid overcrowding to prevent sticking. Lightly brushing with oil enhances crispiness. Cooking times vary: 18-20 minutes in the oven, 8-10 minutes in the air fryer, and 4-6 minutes per side in a pan. Always thaw frozen rolls before cooking for best texture. Serve with your favorite dipping sauce for added flavor. By following these tips, you can achieve perfectly cooked, delicious spring rolls every time.

Final Tips for Perfect Spring Rolls

For the best results, always preheat your cooking appliance and ensure spring rolls are evenly spaced to avoid overcrowding. Lightly brushing with oil enhances crispiness. When air frying, flip halfway for even cooking. In the oven, rotate the tray for uniform browning. Pan frying requires medium heat and constant monitoring to prevent burning. Thaw frozen rolls before cooking for optimal texture. Experiment with dipping sauces like sweet chili or soy sauce for added flavor. Serve immediately after cooking for the crispiest experience. By following these tips, you’ll achieve perfectly cooked, delicious Costco spring rolls every time.

Encouragement to Try the Instructions

Don’t hesitate to try these simple and effective cooking instructions for Costco spring rolls! With minimal effort, you’ll achieve crispy, flavorful results that impress family and friends. Whether you prefer the air fryer, oven, or pan, these methods ensure perfect texture every time. Pair your spring rolls with recommended dipping sauces for an extra burst of flavor. Experiment with garnishes and side dishes to elevate your snack or meal. By following these steps, you’ll unlock the full potential of Costco spring rolls and enjoy a delicious, hassle-free culinary experience. Give it a try and discover how easy it is to create restaurant-quality spring rolls at home!

somewhere over the rainbow score pdf

Somewhere Over the Rainbow is a timeless classic‚ popularized by Israel Kamakawiwo’ole’s iconic ukulele version․ Its simple‚ heartfelt melody makes it a perfect choice for ukulele players of all levels․

1․1 Overview of the Song and Its Popularity

Somewhere Over the Rainbow‚ written by Harold Arlen and E․Y․ Harburg‚ became an instant classic after its debut in the 1939 film The Wizard of Oz․ Its timeless melody and heartfelt lyrics resonated deeply with audiences‚ making it a beloved standard․ The song gained renewed popularity through Israel Kamakawiwo’ole’s iconic ukulele version‚ which introduced it to a new generation․ Its simplicity and emotional depth have made it a favorite among musicians and music lovers alike․ The song’s accessibility on instruments like the ukulele has further boosted its appeal‚ allowing players of all skill levels to enjoy it․ Today‚ it remains a staple in popular culture‚ celebrated for its enduring beauty and universal charm․

1․2 Historical Background and Original Composition

“Somewhere Over the Rainbow” was written by Harold Arlen (music) and E․Y․ Harburg (lyrics) for the 1939 film The Wizard of Oz․ The song was composed in the key of A-flat major and features a memorable melody that has become iconic in American music․ Originally performed by Judy Garland as Dorothy Gale‚ it won the Academy Award for Best Original Song in 1939․ The song’s heartfelt lyrics and soaring melody captured the essence of hope and longing‚ resonating deeply with audiences during the Great Depression․ Its original composition was innovative for its time‚ blending a simple yet powerful structure with rich harmonic progressions․ This timeless piece has since become a standard‚ celebrated for its emotional depth and universal appeal․

The Song’s Musical Elements

The song features iconic chord progressions like C-F-C and Fx2‚ with a memorable melody that blends simplicity and emotional depth‚ making it a timeless musical treasure․

2․1 Chord Progressions and Melody

The song’s chord progressions‚ such as C-F-C and Fx2‚ create a timeless and uplifting feel․ The melody‚ with its simple yet heartfelt structure‚ has become iconic in music history;

The progression flows naturally‚ making it accessible for ukulele players of all levels․ The melody’s emotional depth‚ combined with its memorable phrasing‚ ensures its universal appeal and enduring popularity․

These elements blend seamlessly‚ offering a perfect balance of simplicity and complexity‚ making “Somewhere Over the Rainbow” a beloved choice for musicians and audiences alike․

2․2 Key Signatures and Modulations

The song is primarily written in the key of C Major‚ with a bright and uplifting tone․ The use of relative minor keys‚ such as A minor and E minor‚ adds emotional depth and complexity to the melody․

Modulations are subtle yet effective‚ enhancing the song’s dynamic range; For example‚ the transition from C to F creates a sense of movement‚ while the inclusion of G and Am chords adds richness to the harmonic structure․

These key signatures and modulations are expertly balanced‚ making the song both accessible and engaging for musicians of all levels․ The interplay of major and minor keys contributes to its timeless appeal and universal resonance․

2․3 Instrumental Arrangements for Ukulele and Piano

The ukulele and piano arrangements of “Somewhere Over the Rainbow” are widely popular due to their simplicity and emotional depth․ The ukulele version‚ famously performed by Israel Kamakawiwo’ole‚ features a straightforward chord progression that resonates with listeners worldwide․

The piano arrangement often mirrors the ukulele’s chord structure‚ with arpeggios and melodic fills adding texture․ Both instruments emphasize the song’s iconic melody‚ making it accessible for players of various skill levels․

For ukulele‚ the use of C‚ G‚ F‚ and Am chords creates a harmonious foundation․ Piano arrangements often incorporate these chords with additional harmonies‚ enhancing the song’s timeless appeal․ Players can find PDF scores online‚ tailored for both solo and accompaniment purposes․

These arrangements highlight the song’s versatility‚ allowing musicians to interpret it in their own unique style while maintaining its heartfelt essence․

Israel Kamakawiwo’ole’s Version

Israel Kamakawiwo’ole’s ukulele rendition of ‘Somewhere Over the Rainbow’ is iconic‚ blending emotional depth with innovative jazz chords‚ making it a beloved version worldwide‚ with PDF scores widely available․

3․1 The Iconic Ukulele Interpretation

Israel Kamakawiwo’ole’s ukulele version of “Somewhere Over the Rainbow” is a masterpiece of simplicity and emotional depth․ His interpretation‚ often combined with “What a Wonderful World‚” became a global phenomenon․ The song’s heartfelt melody‚ paired with the ukulele’s gentle tones‚ creates a timeless appeal․ Kamakawiwo’ole’s arrangement is notable for its stripped-down approach‚ focusing on basic chord progressions that make it accessible to players of all levels․ His unique voice and ukulele playing style bring a sense of intimacy and sincerity‚ resonating deeply with listeners․ This version has inspired countless covers and remains a staple in ukulele repertoire‚ with PDF scores widely available for those eager to learn and play his iconic interpretation․

3․2 Unique Jazz Influences and Chord Voicings

Israel Kamakawiwo’ole’s version of “Somewhere Over the Rainbow” is enriched with unique jazz influences‚ particularly in its chord voicings․ The song incorporates extended chords like major sevenths and suspended chords‚ adding a sophisticated yet soulful texture․ These jazz-inspired chord progressions‚ such as Cmaj7 and G7‚ create a lush harmonic foundation․ The arrangement also features intricate hammer-on passages‚ which add a dynamic‚ almost vocal quality to the ukulele playing․ Players can explore these techniques by studying the PDF scores available online‚ which detail the exact chord shapes and fingerings used․ Brittni Paiva’s interpretation‚ for instance‚ highlights how these jazz elements can be seamlessly integrated into the melody․ By mastering these voicings‚ musicians can bring a fresh‚ modern feel to this timeless classic while staying true to its emotional core․

3․3 Hammer-On Passages and Advanced Techniques

Israel Kamakawiwo’ole’s rendition of “Somewhere Over the Rainbow” features intricate hammer-on passages that add a dynamic‚ almost vocal quality to the ukulele playing․ These advanced techniques‚ such as the hammer-on passages in the intro and verses‚ create a smooth‚ flowing sound․ Players can master these by studying the PDF scores‚ which detail the exact fingerings and rhythms․ For example‚ the C-F-Cx2 pattern in the verses showcases how hammer-ons can enhance melodic lines․ Additionally‚ advanced techniques like pull-offs and slides are used to add emotional depth․ To execute these effectively‚ practice slowly and focus on string accuracy․ The score also highlights chord transitions that require precise finger placement․ By mastering these techniques‚ musicians can capture the song’s essence and deliver a captivating performance․ The PDF scores provide clear tablature for these passages‚ making them accessible to dedicated players․

Accessing the Score in PDF Format

The PDF score for “Somewhere Over the Rainbow” can be downloaded from websites like Richard G’s Ukulele Songbook or platforms offering free sheet music arrangements․

4․1 Where to Download the PDF Score

The PDF score for “Somewhere Over the Rainbow” can be easily downloaded from various online platforms․ Websites like Richard G’s Ukulele Songbook and scorpex․net offer free arrangements specifically for ukulele․ Additionally‚ platforms such as MuseScore and Ultimate-Guitar provide high-quality scores that can be downloaded in PDF format․ Many of these arrangements are free‚ making it accessible for musicians of all levels․ When searching‚ ensure to verify the source for accuracy and quality․ Some versions include tabs for solo ukulele‚ while others feature chord charts and lyrics․ Always check for the most recent updates to get the best version for your needs․ Downloading the score is a great way to start learning and playing this beloved song․

4․2 Free Resources and Websites

Several websites offer free PDF scores for “Somewhere Over the Rainbow‚” making it accessible to everyone․ Richard G’s Ukulele Songbook is a popular destination‚ providing well-arranged scores for solo ukulele․ MuseScore and Ultimate-Guitar also host a variety of free arrangements‚ often including chord charts and tabs․ Additionally‚ platforms like scorpex․net and YouTube channels frequently share links to downloadable PDFs․ These resources cater to both beginners and experienced players‚ offering versions with varying levels of complexity․ Many of these sites are user-friendly‚ allowing easy navigation and direct downloads․ By exploring these free resources‚ musicians can find the perfect arrangement to suit their style and skill level‚ ensuring a enjoyable learning and playing experience․

4․4 Tips for Printing and Using the Score

When printing the PDF score for “Somewhere Over the Rainbow‚” ensure your printer is set to the correct paper size‚ typically A4 or Letter․ Choose high-quality settings for clarity․ Print in landscape orientation for better readability of the musical notation․ Use a PDF viewer to preview and adjust scaling if needed․ For convenience‚ bind the sheets together or store them in a folder․ When practicing‚ place the score on a music stand or clipboard to keep your hands free․ Consider annotating the score with finger placements or tempo markings to personalize your learning process․ Always double-check the printer settings before printing to avoid wasted paper․ These tips will help you make the most of your printed score and enhance your playing experience․

Learning to Play the Song

Mastering “Somewhere Over the Rainbow” starts with the PDF score․ Begin with basic chords‚ then gradually incorporate advanced techniques like hammer-ons for a polished performance․

5․1 Beginner-Friendly Tips for Ukulele Players

Beginners can start by learning the basic chords: C‚ G‚ F‚ and Am․ Practice these chords slowly to build finger strength and dexterity․ Focus on the melody first‚ ensuring clean‚ clear notes․ Start with a simple strumming pattern‚ emphasizing downstrokes‚ and gradually incorporate upstrokes for a smoother rhythm․ Use the PDF score to follow along with chord changes and lyrics․ Break the song into sections‚ mastering one part at a time․ Watch video tutorials or play along with recordings to develop timing and tone․ Don’t rush—practice at a tempo that feels comfortable․ As you progress‚ experiment with subtle fingerpicking techniques to enhance the song’s emotional depth․ Remember‚ consistency is key‚ so dedicate a few minutes daily to practice and enjoy the journey of learning this beloved classic․

5․2 Advanced Techniques for Experienced Musicians

Experienced musicians can elevate their performance by incorporating advanced techniques․ Experiment with complex chord voicings‚ such as seventh chords or jazz-inspired variations‚ to add depth to the melody․ Incorporate hammer-on passages and pull-offs for a smoother‚ more dynamic sound․ Try arranging the song in alternate keys or tempos to showcase your unique style․ For a more intricate sound‚ add fingerpicking patterns or arpeggios to highlight the song’s emotional nuances․ Advanced players can also explore improvisational sections‚ blending the iconic melody with personal flair; Use the PDF score as a foundation‚ then expand upon it with creative interpretations․ These techniques will allow you to bring a fresh‚ sophisticated perspective to this timeless classic while maintaining its heartfelt essence․

5․3 Practicing Along with YouTube Performances

Practicing along with YouTube performances is an excellent way to refine your skills․ Start by syncing your PDF score with popular covers‚ such as Israel Kamakawiwo’ole’s iconic version․ Pay attention to tempo‚ strumming patterns‚ and chord transitions․ Use the “slower” feature on YouTube to practice challenging sections at a reduced speed; Focus on mimicking the artist’s technique‚ such as hammer-on passages or fingerpicking styles․ Loop specific parts of the video to master difficult phrases․ Additionally‚ record yourself playing along and compare it to the original to identify areas for improvement․ This method allows you to develop timing‚ tone‚ and overall performance quality․ It’s also a great way to stay motivated and inspired while learning this beloved song․

The Cultural Impact of “Somewhere Over the Rainbow”

The song has become a cultural icon‚ featured in numerous films and media‚ leaving a lasting legacy with modern interpretations that continue to inspire globally․

6․1 The Song’s Role in Popular Culture

“Somewhere Over the Rainbow” has become a cultural phenomenon‚ transcending its origins as a film song․ Its timeless melody and heartfelt lyrics resonate universally‚ evoking emotions of hope and nostalgia․ The song’s iconic status is evident in its widespread use in films‚ TV shows‚ and commercials‚ where it often symbolizes escapism or the pursuit of dreams․ Israel Kamakawiwo’ole’s ukulele version further amplified its popularity‚ introducing it to new generations․ It has also been covered by numerous artists‚ each adding their unique twist‚ which has kept the song relevant in modern culture․ Its adaptability and emotional depth make it a staple in popular media‚ ensuring its enduring presence in global consciousness․

6․2 Its Use in Films and Media

“Somewhere Over the Rainbow” has been featured in numerous films‚ TV shows‚ and commercials‚ becoming a go-to choice for evoking nostalgia and hope․ Its iconic status is evident in its appearances in movies like 50 First Dates and Meet Joe Black‚ where it enhances emotional scenes․ The song’s adaptability allows it to fit seamlessly into various genres‚ from romantic comedies to dramas․ Israel Kamakawiwo’ole’s ukulele version‚ in particular‚ has been widely used due to its soothing and uplifting vibe․ The song’s presence in media has further cemented its cultural significance‚ making it a recognizable and beloved piece globally․ Its ability to resonate with diverse audiences ensures its continued use in storytelling and emotional expression across different platforms․

6․3 Legacy and Modern Interpretations

“Somewhere Over the Rainbow” has left an indelible mark on music history‚ with its timeless melody and heartfelt lyrics continuing to inspire new generations․ Israel Kamakawiwo’ole’s ukulele version remains iconic‚ blending traditional Hawaiian music with modern influences․ The song’s adaptability has led to countless interpretations‚ from jazz renditions to orchestral arrangements‚ each adding a fresh layer to its legacy․ Its emotional resonance and universal appeal ensure it remains relevant in contemporary culture․ Today‚ the song is a staple in music education‚ with PDF scores widely available for musicians of all levels․ Its enduring popularity is a testament to its ability to evoke hope and nostalgia‚ making it a cherished piece for both performers and audiences alike․ The song’s legacy is further cemented by its continued use in new covers and tributes‚ ensuring its timeless appeal endures․

“Somewhere Over the Rainbow” remains a timeless classic‚ its melody and lyrics continuing to inspire․ With accessible PDF scores‚ musicians of all levels can embrace its beauty and play it with passion‚ ensuring its legacy endures for generations to come․

7․1 Final Thoughts on the Song’s Timeless Appeal

“Somewhere Over the Rainbow” captivates audiences with its emotional depth and universal appeal․ Its simple yet profound melody‚ combined with heartfelt lyrics‚ transcends generations and genres․ The song’s versatility allows it to be interpreted in countless ways‚ from Israel Kamakawiwo’ole’s iconic ukulele version to lush orchestral arrangements․ Its presence in films‚ media‚ and popular culture ensures its relevance remains undiminished․ The availability of PDF scores has made it accessible to musicians worldwide‚ fostering a sense of connection and creativity․ Whether played on a ukulele‚ piano‚ or other instruments‚ the song’s essence endures‚ reminding us of hope and the beauty of imagination․ Its timeless charm continues to inspire‚ making it a cherished piece in the world of music․

7․2 Encouragement to Explore and Play

Exploring and playing “Somewhere Over the Rainbow” is a rewarding experience for musicians of all skill levels․ With its timeless melody and heartfelt lyrics‚ the song offers a unique opportunity to connect with its emotional depth․ Beginners can start with simplified ukulele arrangements‚ while advanced players can delve into intricate jazz chord voicings and hammer-on techniques․ The availability of free PDF scores and online resources makes it easier than ever to access and learn the song․ Whether you’re playing for personal enjoyment or sharing it with others‚ this iconic piece promises to inspire and delight․ Embrace the journey of mastering it‚ and let the song’s magic resonate through your music․

oikiture bed frame assembly instructions

Welcome to the comprehensive guide for assembling your Oikiture bed frame. This step-by-step manual will walk you through preparation, tools, and troubleshooting for a seamless experience.

Overview of the Assembly Process

The Oikiture bed frame assembly process is straightforward but requires attention to detail. It involves unpacking, organizing, and systematically assembling various components. Begin by attaching side rails to the headboard and footboard, then connect them to form the base. Next, install support legs and secure the slatted base. If applicable, assemble and attach storage units. Finally, tighten all connections and ensure stability. The process is manageable with patience and proper tool usage, following the manual step-by-step.

Importance of Following Instructions

Following the instructions for assembling the Oikiture bed frame is crucial for ensuring safety, stability, and durability. Misaligned or improperly secured parts can lead to a shaky frame or even collapse. By adhering to the guide, you avoid potential hazards and guarantee a sturdy structure. Proper assembly also preserves the product’s warranty and maintains its aesthetic appeal. Take your time to follow each step carefully, as shortcuts may compromise the final result. This attention to detail ensures a safe and enjoyable experience with your new bed frame.

Preparing for Assembly

Before starting, ensure all components and tools are ready; Clear a large, flat workspace and gather the instruction manual. Plan the assembly sequence.

Gathering Tools and Materials

Start by collecting all necessary tools and materials. Typically, you’ll need an Allen wrench, screwdriver, and bolts. Check the manual for specific tools required. Ensure all hardware like screws, washers, and brackets is accounted for. Organize components to avoid confusion. Verify the bed frame kit includes everything listed. Having everything ready saves time and prevents delays. Keep tools within reach to streamline the process. Double-checking ensures no missing parts, allowing assembly to proceed smoothly.

Setting Up the Workspace

Choose a large, flat, and stable area for assembly. Clear the floor of clutter to avoid tripping hazards. Lay down a soft cloth or mat to protect the bed frame components from scratches. Position the bed frame in the center of the room for easy access. Ensure good lighting to see small parts clearly. Keep tools and hardware within reach to save time. A clean, organized workspace reduces errors and speeds up the assembly process. Ensure the area is safe from distractions, like children or pets, to maintain focus.

Understanding the Hardware Provided

Familiarize yourself with the hardware included in the Oikiture bed frame kit. Common items include bolts, screws, dowels, and Allen keys. Each piece serves a specific purpose, such as securing the frame or attaching slats. Refer to the instruction manual for a detailed list and diagrams. Count and organize the hardware to ensure all parts are included. Misplacing or misidentifying hardware can delay assembly. Understanding each component’s role helps streamline the process and ensures a secure, stable structure; Proper hardware usage is essential for safety and durability.

Unpacking and Inventory

Begin by carefully unpacking the bed frame box to avoid damaging any components. Inside, you’ll find the frame pieces, slats, screws, and an instruction manual. Check for completeness by comparing the contents with the manual’s inventory list. Ensure no parts are missing or damaged before proceeding. This step is crucial for a smooth assembly process and to avoid delays. Organize the components neatly for easy access during assembly.

Checking All Components

Thoroughly inspect each part for damage or defects. Count and verify all major components, such as side rails, slats, and support legs, against the manual’s inventory list. Ensure all hardware, including bolts, screws, and allen keys, is included and undamaged. Check for any signs of wear or manufacturing defects. If any part is missing or damaged, contact customer support immediately. Organizing the components by type will help streamline the assembly process and prevent confusion later on. Accuracy here ensures a trouble-free assembly experience.

Matching Parts with Instruction Manual

Once all components are unpacked, cross-reference each part with the diagrams and labels in the instruction manual. This step ensures every piece is accounted for and correctly identified. Pay attention to labels or codes on the parts that match the manual’s descriptions. If unsure, refer to the exploded view diagrams for clarity. Organizing parts by type or function as you go will save time and reduce confusion during assembly. Patience here ensures accuracy and avoids mismatches later on.

Organizing Parts for Efficiency

Sort and group similar components, like bolts, screws, and brackets, into separate containers for easy access. Use small bins or bags to keep hardware organized by type and size. Label each container to quickly identify contents. Place larger parts, such as side rails or slats, in a designated area away from smaller items. This methodical approach reduces assembly time and minimizes the risk of misplacing essential pieces. A well-organized workspace ensures a smoother and more efficient assembly process.

Assembling the Side Rails

Align side rails with headboard and footboard, ensuring a secure fit. Use provided hardware to tighten connections. Double-check alignment for optimal stability.

Attaching the Side Rails to the Headboard

Align the side rails with the pre-drilled holes on the headboard. Insert the bolts provided into the holes and gently tighten them by hand. Ensure the rails are evenly spaced and flush with the headboard’s edges. Use a wrench or Allen key to secure the bolts firmly, but avoid over-tightening to prevent damage. Double-check the alignment to ensure stability and proper fit. This step is crucial for maintaining the structural integrity of the bed frame.

Securing the Side Rails to the Footboard

Position the side rails against the footboard, aligning the bolt holes. Insert the provided bolts into the pre-drilled holes and hand-tighten them. Use a wrench or Allen key to firmly secure the bolts, ensuring they are tightened evenly. Double-check the alignment to confirm the rails are straight and properly attached. This step ensures the bed frame is sturdy and evenly balanced, preventing any wobbling or instability. Proper securing of the side rails to the footboard is essential for long-term durability and safety.

Building the Bed Frame Structure

Start by aligning the main frame components, then secure them using the provided hardware. Tighten all connections to ensure stability and proper alignment for a sturdy bed structure.

Connecting the Side Rails

To connect the side rails, align them with the pre-drilled holes on the headboard and footboard. Use the provided bolts to secure them firmly. Tighten the bolts in a star pattern to ensure even pressure. Double-check that the rails are level and the frame is balanced. Proper alignment is crucial for the bed’s stability and longevity.

Installing the Support Legs

Position the support legs at the designated points on the bed frame, typically beneath the side rails or slatted base. Align the legs with the pre-drilled holes and secure them using the appropriate screws from the hardware bag. Tighten the screws firmly to ensure stability, but avoid overtightening initially to allow for minor adjustments. Once all legs are in place, tighten them fully to ensure the frame is balanced and sturdy. This step is crucial for preventing wobbling and ensuring the bed remains level and secure.

Ensuring Frame Stability

To ensure the bed frame is stable, start by verifying that all connections are secure and properly tightened. Use a spirit level to check that the frame is evenly balanced and not leaning. If necessary, adjust the support legs to achieve a level surface. Double-check that all bolts and screws are tightened firmly but avoid overtightening, which could damage the frame. Finally, apply gentle pressure to test the stability and make any final adjustments to ensure the bed is rock-solid and safe to use.

Attaching the Slatted Base

Align the slatted base with the frame, ensuring proper fit and alignment. Secure the slats to the side rails using the provided hardware. Tighten evenly.

Aligning the Slats with the Frame

Securing the Slats to the Side Rails

Once the slats are aligned, use the provided bolts and washers to secure them to the side rails. Start by attaching the center slat to ensure balance, then work your way outward. Tighten each bolt firmly, but avoid overtightening to prevent damage. Ensure all slats are evenly secured for consistent support. Use a wrench for added grip while tightening. Double-check that all connections are snug and even to guarantee the slatted base is stable and properly integrated with the frame.

Tightening the Slatted Base

After securing the slats to the side rails, use an Allen wrench to tighten all bolts evenly. Start from the center and work outward to maintain balance. Ensure each bolt is snug but not overtightened, as this could damage the slats or frame. Double-check each connection to confirm stability. Once tightened, inspect the slatted base to ensure it lies flat and aligns perfectly with the frame. Proper tightening ensures optimal support and prevents sagging or shifting over time.

Adding Storage (If Applicable)

If your bed frame includes storage, follow specific instructions for assembling drawers or compartments. Ensure all parts are securely attached to maintain the frame’s stability and functionality. Organize items neatly to maximize space and keep your bedroom clutter-free.

Assembling Storage Drawers

Begin by unpacking all drawer components, including the drawer base, sides, and front panel. Attach wheels or glides to the bottom of the drawer using the provided screws. Next, assemble the drawer frame by aligning the sides with the base and securing them tightly. Attach the front panel to the frame for a finished look; Ensure all connections are sturdy and properly aligned. Finally, install the drawer slides onto the bed frame and insert the drawer to complete the storage unit.

Attaching Storage Units to the Frame

Once the storage drawers are assembled, position them near the bed frame. Locate the pre-drilled holes or attachment points on the frame. Use the provided bolts or brackets to secure the storage unit to the bed. Ensure proper alignment to maintain stability. Tighten all connections firmly but avoid over-tightening. Double-check the unit’s placement and stability before use. Refer to the manual for specific attachment points and hardware requirements to ensure a safe and secure installation.

Finalizing the Assembly

Tighten all connections and ensure the bed frame is stable. Double-check alignment and security of all components. Verify that all parts are properly attached and secure.

Aligning and Tightening All Connections

Ensure all bolts, screws, and brackets are properly aligned before tightening. Use an Allen wrench or screwdriver to secure connections firmly. Double-check each joint to confirm alignment and stability. Tighten all hardware in a systematic order to avoid misalignment. Apply even pressure to prevent stripping screws. Verify that all moving parts operate smoothly and silently. Repeat the tightening process for any components that may have loosened during assembly. This step ensures long-term durability and safety of the bed frame.

Double-Checking for Stability

Gently shake the bed frame to ensure it is stable and does not wobble. Check all connections, especially at the joints, to confirm they are secure. Apply moderate pressure to the center of the frame to test its durability. Ensure the bed sits evenly on the floor and does not tilt. Verify that all support legs are firmly in place and evenly distributed. This step guarantees the bed frame is safe and sturdy for everyday use.

Final Inspection Before Use

Conduct a final inspection to ensure all components are correctly assembled and tightened. Check for any loose screws or bolts that may have been missed. Verify that the slatted base is properly aligned and securely attached to the side rails. Ensure there are no sharp edges or protruding parts that could cause injury. If storage units are present, confirm they are firmly attached and function smoothly. Finally, make sure the bed frame is clean and free of any debris before use.

Tips for a Smooth Assembly

Plan ahead, use the correct tools, and maintain a clean workspace. Follow instructions step-by-step and double-check each part before moving forward for a hassle-free experience.

Using the Right Tools

To ensure a smooth assembly process, gather all necessary tools beforehand. Typically, an Allen wrench, screwdriver, and bolts are provided. Check the toolkit to confirm completeness. Using the correct tools prevents damage to hardware and ensures proper tightening. Optional tools like clamps or a rubber mallet can aid in aligning parts. Always refer to the manual for specific tool recommendations. Proper tools streamline assembly, reducing frustration and ensuring a secure, professional finish.

Following the Manual Closely

Adhering strictly to the assembly manual ensures accuracy and prevents errors. The manual provides a step-by-step guide, complete with diagrams, to help you understand each process. Skipping steps or deviating from instructions can lead to misaligned parts or instability. By following the manual closely, you ensure all components fit together seamlessly. This attention to detail guarantees a sturdy and functional bed frame, avoiding potential issues during or after assembly.

Avoiding Common Mistakes

To ensure a smooth assembly process, avoid common pitfalls like rushing through steps or assuming familiarity with parts. Misaligned pieces or over-tightening bolts can damage components. Always organize parts beforehand to prevent losing or mixing them. Double-checking each step before proceeding helps catch errors early. Avoiding these mistakes saves time and ensures a stable, durable bed frame. Patience and attention to detail are key to a successful assembly experience.

Troubleshooting Common Issues

Identify and resolve common assembly issues, such as misaligned parts or loose connections, by reviewing instructions and ensuring all hardware is correctly secured. This prevents structural weaknesses.

Dealing with Misaligned Parts

If parts don’t align properly, recheck the manual to ensure correct orientation. Disassemble if necessary and retry. Measure components to confirm they match the manual’s specifications; Use shims or adjust angles gently to achieve proper fit. Patience is key to avoid forcing pieces, which may damage the frame. If issues persist, consider consulting online resources or contacting customer support for clarification. Proper alignment is crucial for stability and safety. Double-checking each step can prevent future assembly problems.

Resolving Tightening Problems

If bolts or screws won’t tighten properly, ensure they’re fully seated and aligned with pre-drilled holes. Check for any debris or paint obstructing the hardware. Use a rubber mallet to gently tap pieces into place before tightening. Avoid over-tightening, as this can strip screws or damage wood. If issues persist, consult the manual or contact customer support for replacement hardware. Proper tightening ensures the frame’s stability and longevity, so take time to address any looseness promptly during assembly.

Addressing Stability Concerns

Ensure all legs and support beams are evenly placed and tightly secured. If the frame feels unstable, verify that all bolts and screws are fully tightened and aligned correctly. Check for any wobbling by gently rocking the frame; if it persists, adjust the legs or ensure the floor is level. Proper alignment of slats and side rails also contributes to stability. Double-checking these areas helps prevent structural issues and ensures a safe, durable bed frame.

Congratulations! You’ve successfully assembled your Oikiture bed frame. Take pride in your accomplishment and enjoy the comfort and durability of your newly assembled bed.

Final Thoughts on the Assembly Process

Completing the Oikiture bed frame assembly is a rewarding experience that leaves you with a sense of accomplishment. While the process may seem daunting at first, patience and careful attention to detail ensure a sturdy and comfortable final product. Taking your time to follow each step and double-check your work is key to avoiding frustration. The end result is a well-crafted bed that enhances your bedroom’s aesthetics and provides lasting durability. Enjoy the satisfaction of a job well done and the comfort of your new bed!

Enjoying Your Newly Assembled Bed Frame

Your newly assembled Oikiture bed frame is now ready to enhance your bedroom experience. Take pride in knowing you’ve crafted a sturdy, stylish piece that reflects your effort and dedication. Ensure a comfortable setup by adding your preferred mattress and bedding. Personalize the space with decor that complements the frame’s design. Regularly inspect and tighten connections to maintain stability. With proper care, your bed will remain a cozy and reliable centerpiece for years to come. Relax and enjoy the fruits of your labor!

singer 237 manual

Welcome to the Singer 237 Sewing Machine manual! This guide provides comprehensive instructions to help you master your sewing experience․ Designed for both beginners and experienced sewists, it offers detailed insights into machine setup, operation, and maintenance․ Explore its features, troubleshooting tips, and creative possibilities to enhance your sewing projects․

1․1 History and Development of the Singer 237 Sewing Machine

The Singer 237 sewing machine was introduced as part of Singer’s Heavy Duty series, designed to combine durability and versatility․ Built with an all-metal frame, it offers robust performance for sewing thick fabrics and heavy-duty projects․ Its development reflects Singer’s commitment to innovation, catering to both home sewists and small-scale commercial use․ The model is part of a lineage of reliable sewing machines that have earned Singer a reputation for quality and dependability․ The Singer 237 manual provides detailed guidance on its operation, maintenance, and troubleshooting, ensuring users can maximize its capabilities․ This machine has become a trusted tool for sewists worldwide, supporting creative and practical sewing needs․

1․2 Target Audience for the Singer 237 Sewing Machine

The Singer 237 sewing machine is designed for a diverse range of users, from beginners to experienced sewists․ Its user-friendly features make it accessible to those new to sewing, while its heavy-duty capabilities appeal to professionals and hobbyists tackling thicker fabrics․ Home sewists, crafters, and small business owners benefit from its reliability and versatility․ The machine’s robust construction and ease of use ensure it meets the needs of various skill levels․ Whether for personal projects or commercial tasks, the Singer 237 is a versatile tool that adapts to different sewing requirements, making it a popular choice across multiple user groups․

1․3 Quick Start Guide for Beginners

Getting started with the Singer 237 is straightforward! First, unbox and inspect the machine․ Familiarize yourself with the parts and accessories included․ Plug in the machine and ensure it’s placed on a stable surface․ Thread the machine by following the guides, ensuring proper tension․ Select the desired stitch and adjust the settings as needed․ Place your fabric under the presser foot and begin sewing at a steady pace․ Practice on scrap fabric to get comfortable with the controls․ Refer to the manual for detailed threading instructions and troubleshooting tips․ With these simple steps, you’ll be sewing like a pro in no time․ Keep the manual handy for quick reference and enjoy your creative journey with the Singer 237․

Key Features of the Singer 237 Sewing Machine

The Singer 237 is a heavy-duty sewing machine with an all-metal frame, offering durability and versatility․ It handles thick fabrics and long seams effortlessly, making it ideal for heavy-duty projects․ With multiple stitch options and smooth operation, it delivers professional results for sewists of all skill levels․ Its robust design and powerful performance ensure years of reliable service, making it a trusted companion for creative and practical sewing endeavors․

2․1 Design Overview and Build Quality

The Singer 237 sewing machine features a robust, all-metal frame that ensures durability and stability during operation․ Its compact design makes it suitable for various workspaces, while the sleek, DuraPresser finish enhances its appearance․ The machine’s solid build contributes to its heavy-duty capabilities, allowing it to handle thick fabrics effortlessly․ The overall design emphasizes functionality, with easy-to-reach controls and a clear workspace․ Weighing in at a substantial 20 pounds, the Singer 237 is built to last, offering a reliable sewing experience for both professionals and home users․ Its construction reflects Singer’s commitment to quality, making it a trusted tool for sewing enthusiasts․

2․2 Stitch Options and Customization

The Singer 237 sewing machine offers an impressive array of stitch options, including straight, zigzag, and decorative stitches, catering to diverse sewing needs․ With adjustable stitch length and width, users can customize settings to suit various fabrics and projects․ The machine also features a reverse stitch option for secure seams․ Additionally, the tension can be fine-tuned for optimal stitching on different materials․ This versatility allows for personalized control, making it ideal for both basic and intricate sewing tasks․ The Singer 237’s stitch customization options empower users to achieve professional-quality results with ease, ensuring every project meets their creative vision and practical requirements․

2․3 Heavy-Duty Capabilities and Performance

The Singer 237 sewing machine excels in heavy-duty applications, powered by a robust motor that effortlessly handles thick fabrics like denim and canvas․ Its metal frame ensures durability and stability, minimizing vibrations for consistent stitching․ With a high sewing speed, it efficiently manages large-scale projects, making it ideal for both heavy-duty tasks and lighter fabrics․ This versatility, combined with its powerful construction, allows users to tackle a wide range of sewing projects with confidence and precision, ensuring reliability and professional-quality results․

Parts and Accessories of the Singer 237

The Singer 237 comes with essential accessories like bobbins, needles, and a dust cover․ Optional attachments enhance functionality, while compatible Singer tools expand its versatility․

3․1 Standard Accessories Included with the Singer 237

The Singer 237 sewing machine comes with a variety of standard accessories to help you get started with your sewing projects․ These include multiple bobbins, a set of sharp, durable needles, and a convenient dust cover to protect your machine when not in use․ Additionally, you’ll find a selection of basic presser feet, such as the all-purpose foot for general sewing and the zipper foot for precise stitching․ These accessories are designed to support a wide range of sewing tasks and ensure you have everything you need to begin crafting immediately․ The inclusion of these essentials enhances the overall value and usability of the Singer 237․

3․2 Optional Accessories for Enhanced Functionality

To further enhance your sewing experience with the Singer 237, several optional accessories are available․ These include specialized presser feet, such as a walking foot for heavy fabrics or a quilting foot for larger projects, which improve stitch quality and control․ An extension table is another useful accessory, providing additional workspace for managing bulky fabrics․ Additional bobbins and needles can also be purchased, allowing for more thread color options and compatibility with various fabric types; These optional accessories enable you to explore advanced sewing techniques and expand the capabilities of your Singer 237 sewing machine, making it even more versatile for your creative projects․

3․3 Compatibility with Additional Sewing Tools and Attachments

The Singer 237 is designed to work seamlessly with a variety of additional sewing tools and attachments, expanding its functionality․ Compatible attachments include zipper feet, hemming feet, and edge joiners, which can be easily fitted to handle specialized tasks․ The machine also supports standard Singer sewing accessories, ensuring versatility for different projects․ This compatibility allows users to explore advanced sewing techniques and customize their workflow․ Whether you’re working on heavier fabrics or intricate designs, the Singer 237’s adaptability makes it a reliable choice for both beginners and experienced sewists, enabling you to achieve professional results with ease and precision;

Setup and Installation of the Singer 237

Setting up the Singer 237 involves unboxing, placing it on a stable surface, and assembling any additional parts․ Ensure all components are included and undamaged before use․

4․1 Unboxing and Initial Setup Process

Unboxing the Singer 237 sewing machine is an exciting first step․ Carefully remove the machine from its packaging and inspect for any damage․ Ensure all accessories, like the power cord, foot pedal, and standard presser feet, are included․ Place the machine on a stable, flat surface, such as a sewing table or countertop․ Before turning it on, familiarize yourself with the control panel andbobbin compartment․ Organize the included parts and accessories for easy access․ Finally, read the manual thoroughly to understand the machine’s features and operation․ This initial setup ensures a smooth and safe sewing experience for beginners and experienced users alike․

4․2 Step-by-Step Threading Guide

Threading the Singer 237 sewing machine is a straightforward process․ Begin by placing the spool of thread on the spool pin․ Gently pull the thread through the tension discs, ensuring it passes through the correct channel․ Next, guide the thread around the take-up lever and through the eye of the needle․ Use the handwheel to lower the needle slightly, then pull the thread to seat it properly․ For the bobbin, place the thread through the bobbin winder and wind it until full․ Cut the thread, then insert the bobbin into the bobbin case․ Ensure the thread is taut but not overly tight․ Finally, test the tension by pulling gently on the thread․

4․3 Oil and Lubrication Requirements

Regular lubrication is essential to maintain the Singer 237 sewing machine’s performance․ Use high-quality sewing machine oil, as specified in the manual․ Apply a few drops to the bobbin hook area and the tension discs․ Gently rotate the handwheel to distribute the oil evenly․ Ensure the machine is turned off before lubricating․ Avoid over-oiling, as it may attract dust and dirt․ For heavy-duty use, lubricate every 10 hours of operation․ Always refer to the manual for specific oil application points․ Proper lubrication ensures smooth operation, reduces friction, and extends the machine’s lifespan․ Regular maintenance prevents mechanical wear and keeps the Singer 237 running efficiently․

Basic Operations and Sewing Techniques

The Singer 237 sewing machine operates smoothly with basic techniques․ Start with proper fabric alignment, use the foot pedal for control, and guide fabric steadily․ Always maintain consistent tension for even stitches․ Practice straight-stitch sewing before exploring decorative options․ Regularly check thread tension to ensure professional results․ Keep fabric moving at a steady pace to avoid puckering or uneven stitching․ These fundamental techniques will help you master both simple and complex sewing projects efficiently․

5․1 Selecting the Right Stitch for Your Fabric

Selecting the appropriate stitch for your fabric is essential for optimal results․ The Singer 237 offers various stitch options, each suited for specific materials․ For lightweight fabrics like cotton or polyester, use the straight stitch․ Stretchy fabrics benefit from the zigzag stitch, while delicate materials like silk require a fine, short straight stitch․ Heavier fabrics, such as denim, can handle the heavy-duty straight stitch․ Always consult the stitch chart on your machine to match the fabric type with the correct stitch․ Testing on a scrap piece ensures the stitch choice and tension are suitable, preventing damage to your project․

5․2 Basic Sewing Techniques for Beginners

Mastering basic sewing techniques is crucial for beginners using the Singer 237․ Start by ensuring the machine is properly threaded and the correct needle is installed․ Practice sewing straight lines on scrap fabric to get familiar with the machine’s rhythm․ Use the handwheel to guide the fabric smoothly under the needle․ Backstitch at the beginning and end of seams for durability․ For even stitching, maintain consistent fabric tension and keep the fabric moving at a steady pace․ Practice sewing curves and corners by gently pivoting the fabric․ These foundational techniques will help build confidence and improve your sewing skills over time․

5․3 Adjusting Tension and Stitch Length

Adjusting tension and stitch length on the Singer 237 ensures optimal sewing results․ The tension dial controls the tightness of the stitches, while the stitch length dial determines the size of the stitches․ For lightweight fabrics, a shorter stitch length (2-3mm) is ideal, while heavier fabrics require longer stitches (4-5mm)․ To adjust tension, turn the dial until the thread flows smoothly without pulling too tight or loose․ Test stitches on scrap fabric to ensure evenness․ Proper adjustment prevents puckering, loose seams, or broken threads․ Always refer to the manual for specific settings for different fabrics and techniques․

Advanced Features of the Singer 237

The Singer 237 offers advanced features like automatic needle threader, LED light, and heavy-duty stitching․ These enhance precision and efficiency for complex sewing projects․

6․1 Using the Pattern Projector for Precision Sewing

The Singer 237 features a built-in pattern projector, designed to illuminate stitching patterns onto fabric for precise alignment․ This advanced tool enhances visibility, making intricate designs easier to sew․ To use it, simply select your desired stitch pattern and adjust the projection brightness․ The clear light ensures accurate placement, reducing errors and saving time․ Ideal for quilting, embroidery, or decorative stitching, the pattern projector allows for professional-looking results․ It’s a game-changer for sewists aiming for perfection in their projects․ Follow the manual’s guidance to optimize this feature and achieve flawless stitching every time․

6․2 Heavy-Duty Sewing Machine Options and Capabilities

The Singer 237 is engineered for heavy-duty sewing, offering robust capabilities for thick fabrics like denim, canvas, and leather․ Its powerful motor ensures smooth operation even with heavy materials, while the all-metal frame provides durability and stability․ The machine supports a wide range of stitch types, including heavy-duty options, and features an automatic needle threader for efficiency․ With a maximum stitch speed of 1,100 stitches per minute, it’s ideal for large-scale projects․ The heavy-duty capabilities make it suitable for professionals and home sewists tackling demanding tasks․ This feature-rich machine balances power with precision, ensuring reliable performance for both heavy-duty and delicate sewing needs․

Maintenance and Troubleshooting

Regular cleaning and oiling are essential for the Singer 237’s longevity․ Lubricate moving parts and check for worn components․ For issues like thread breakage or noise, consult the troubleshooting guide for solutions․

7․1 Regular Maintenance Tips for Longevity

Regular maintenance is crucial to ensure the Singer 237 sewing machine operates smoothly and lasts for years․ Start by cleaning the machine thoroughly, removing lint and debris from the bobbin area, tension discs, and feed dogs․ Use a soft brush or compressed air for this purpose․ Next, lubricate the machine with Singer-recommended oil, focusing on moving parts like the shuttle hook and gear areas․ Replace the needle regularly to prevent breakage and fabric damage․ Check belts and hoses for signs of wear and tear․ Finally, store the machine in a dry, cool place, away from direct sunlight, to protect its finish and internal components․

7․2 Common Issues and Troubleshooting Solutions

The Singer 237 sewing machine, like any mechanical device, may encounter issues․ One common problem is thread bunching or uneven stitching, often caused by incorrect threading or tension․ To resolve this, rethread the machine and adjust the tension discs․ Another issue is a broken or bent needle, which can damage fabric․ Always use the correct needle type and size for your fabric․ If the machine is noisy or vibrates excessively, check for loose parts or debris inside․ Clean the interior and ensure all components are securely tightened․ For persistent problems, consult the Singer 237 manual or contact authorized service providers for professional assistance․

8․1 Final Thoughts on the Singer 237 Sewing Machine

The Singer 237 sewing machine is a versatile and user-friendly appliance designed for both beginners and experienced sewists․ Its robust construction and wide range of stitch options make it ideal for various sewing projects․ With proper care and regular maintenance, the Singer 237 can deliver years of reliable service․ Whether you’re crafting garments, repairing fabrics, or creating decorative items, this machine offers the precision and durability needed to achieve professional results․ By following the Singer 237 manual, users can unlock its full potential and enjoy a seamless sewing experience․

The Singer 237 sewing machine stands out as a reliable and versatile tool for sewists of all skill levels․ Its durable design and wide range of stitch options ensure it can handle various fabrics and projects effortlessly․ Whether you’re a beginner or an experienced sewer, this machine offers simplicity and precision․ The included accessories and clear manual make it easy to get started, while its robust construction promises long-term performance․ With proper maintenance, the Singer 237 can become a trusted companion for years of creative sewing․ Its blend of functionality and affordability makes it an excellent choice for anyone looking to enhance their sewing capabilities․

8․2 Resources for Further Learning and Support

For further learning and support, users of the Singer 237 sewing machine can explore various resources․ The official Singer website offers detailed manuals, instructional videos, and FAQs․ Additionally, YouTube channels and sewing blogs provide step-by-step tutorials and tips tailored to the Singer 237․ Sewing communities and forums are excellent for connecting with experienced users and troubleshooting common issues․ Local sewing classes or workshops can also offer hands-on guidance․ Singer’s customer support team is available for direct assistance with machine-specific queries․ These resources ensure users can maximize their sewing experience and overcome any challenges they may encounter while using the Singer 237․

jackson ice skates size guide

Jackson Ice Skates are renowned for their high-quality, performance-focused designs. Popular among both competitive and recreational skaters, they offer a wide range of sizes and fits.

1.1 Overview of Jackson Ice Skates

Jackson Ice Skates are a trusted brand in the skating community, known for their exceptional quality and performance. With a rich history of innovation, Jackson caters to both competitive and recreational skaters. Their skates are designed to deliver precision, comfort, and durability, making them a preferred choice for figure skating, hockey, and leisure skating. The brand offers a wide range of models to suit different skating styles and preferences. From entry-level to advanced skates, Jackson ensures that every product meets high standards of craftsmanship. Their commitment to excellence has made them a staple in the skating world, providing skaters with the tools they need to excel on the ice.

1.2 Importance of Proper Sizing in Ice Skates

Proper sizing in ice skates is crucial for optimal performance, comfort, and safety. Ill-fitting skates can lead to discomfort, blisters, and even long-term foot issues. They can also hinder skating technique, reducing control and precision on the ice. Additionally, skates that are too tight or too loose may cause fatigue, making it harder to enjoy or excel in skating. Correct sizing ensures proper support and alignment, allowing skaters to perform at their best. For Jackson Ice Skates, accurate sizing is key to maximizing their renowned quality and fit. Always prioritize precise measurements to avoid common pitfalls like sizing too small or too large.

Understanding the Importance of Proper Fit

Proper fit is crucial for optimizing performance, comfort, and safety. Ill-fitting skates can hinder movement and lead to discomfort or injury during skating sessions.

2.1 Performance and Comfort

A proper fit in Jackson Ice Skates is essential for maximizing both performance and comfort on the ice. Skaters need a snug fit to ensure support and stability, which are critical for executing jumps, spins, and other dynamic movements. A well-fitting skate allows for better control and precision, enabling skaters to perform at their best. Comfort is equally important, as ill-fitting skates can lead to blisters, fatigue, and discomfort, which can hinder performance. Jackson Ice Skates are designed with high-quality materials and craftsmanship to provide a balance of support and comfort, making them ideal for skaters of all levels. Proper sizing ensures that skaters can enjoy their time on the ice without distractions.

2.2 Preventing Injuries with the Right Size

Preventing injuries with the right size is crucial for a safe and enjoyable skating experience. Ill-fitting skates can lead to discomfort, blisters, and even long-term foot or ankle issues. When skates are too tight, they can restrict movement and cause pressure sores, while skates that are too loose may lead to instability and accidents. Properly fitted skates provide adequate support, reducing the risk of injuries such as sprains or fractures. Additionally, they ensure better control and balance on the ice, minimizing the likelihood of falls. Choosing the correct size is not just about comfort but also about protecting your health and performance. Jackson Ice Skates are designed with these considerations in mind, offering precise sizing options to cater to every skater’s needs.

Key Considerations When Choosing Jackson Ice Skates

When selecting Jackson Ice Skates, consider foot shape, skating level, and width options to ensure proper fit, comfort, and optimal performance for all skaters.

3.1 Foot Shape and Size Variability

Foot shape and size variability play a crucial role in selecting the right Jackson Ice Skates. Everyone’s feet are unique, varying in length, width, and shape, which can impact the fit and comfort of the skates. Some skaters may have narrower or wider feet, while others may have longer toes or higher arches. Jackson Ice Skates offers a range of models to accommodate these differences, ensuring optimal performance and comfort. Understanding your foot shape and size is essential for choosing the correct skate. Whether you have flat feet, high arches, or a specific width preference, Jackson provides options to suit various needs. Proper fit ensures better control, stability, and skating efficiency, making it vital to consider foot shape and size when selecting your skates.

3.2 Skating Level and Skate Type

The skating level and type of skating significantly influence the choice of Jackson Ice Skates. Recreational skaters may prefer models with softer boots for comfort, while competitive skaters need stiffer boots for better support. Professional skaters often opt for high-end models designed for precision and durability. Figure skates and hockey skates differ in design, with figure skates featuring a picks toe for jumps and spins, and hockey skates emphasizing speed and agility. Selecting the right skate type ensures optimal performance and comfort, regardless of skill level or skating discipline. Consulting a sizing guide or expert can help match the skate to the skater’s specific needs.

3.3 Width and Comfort Fit

When selecting Jackson ice skates, width and comfort fit are crucial for optimal performance and satisfaction. Skaters with wider feet often struggle with standard widths, but Jackson offers various options to accommodate different foot shapes. A proper fit ensures even pressure distribution, reducing discomfort and enhancing control. Comfort fit skates feature soft, padded liners and ergonomic designs to minimize blisters and provide all-day wearability. Narrow or wide widths can significantly impact skating efficiency, so it’s essential to choose a size that aligns with your foot’s natural shape. Prioritizing both width and comfort ensures a better skating experience and prevents long-term foot issues.

How to Measure Your Feet for Jackson Ice Skates

Accurate foot measurement is crucial for proper skate fit. Stand straight, trace feet on paper, and measure length and width with a ruler. Measure in the afternoon when feet are largest.

4.1 Tools Needed for Accurate Measurement

To ensure precise sizing, gather essential tools: a Brannock device or flexible measuring tape for foot length and width. Use a ruler for tracing foot outlines on paper. Wear skating socks during measurement for accuracy. Stand on a firm surface, distributing weight evenly. Record measurements carefully to match Jackson’s sizing chart.

4.2 Step-by-Step Measurement Guide

To measure your feet for Jackson Ice Skates, start by standing barefoot on a flat surface. Place your foot on a ruler or use a Brannock device. Measure the length from the back of the heel to the tip of the longest toe. Note the width at the widest point. Compare measurements to the Jackson sizing chart. Ensure both feet are measured, as sizes may differ. Record the larger size to ensure a comfortable fit. Consider the thickness of your socks and any personal fit preferences. Double-check measurements for accuracy to avoid sizing errors. Proper fit is crucial for performance and comfort.

4.3 Converting Measurements to Skate Sizes

Converting foot measurements to Jackson Ice Skate sizes requires careful alignment with their sizing chart. Measure the length and width of your foot in inches or centimeters. Use the Jackson size chart to match your measurements to the corresponding skate size. Ensure accuracy by considering both length and width, as skates come in different widths. If your foot measurement falls between sizes, opt for the larger size for comfort. Double-check the conversion to avoid sizing errors. Proper conversion ensures a snug, supportive fit, enhancing performance and comfort on the ice. For precise fitting, consult a professional fitter or use Jackson’s official size guide.

Jackson Ice Skates Sizing Chart

The Jackson Ice Skates sizing chart provides a detailed guide for men, women, and children, ensuring accurate fit based on foot length and skate size. Referencing this chart helps in selecting the right size for optimal performance and comfort. Always consult the chart before purchasing to guarantee the best fit.

5.1 Men’s Sizing Chart

The Jackson Ice Skates men’s sizing chart provides a detailed guide to help skaters find their ideal fit. It typically includes shoe size, skate size, and corresponding foot length in inches or centimeters. The chart is structured to align with standard sizing conventions, ensuring accuracy for men of all sizes. It’s important to note that sizes may vary slightly between different models, so skaters should refer to the specific model’s sizing chart for precise measurements. Below is a sample representation of a typical Jackson men’s sizing chart:

Shoe Size Skate Size Foot Length (in)
7 6 9.5
8 7 9.8
9 8 10.2

This chart serves as a reliable reference for men selecting Jackson Ice Skates, ensuring a comfortable and performance-enhancing fit. For any uncertainties, it’s recommended to consult Jackson’s customer support or visit an authorized retailer for professional sizing assistance.

5.2 Women’s Sizing Chart

The Jackson Ice Skates women’s sizing chart is designed to cater to a variety of foot sizes and shapes. It typically ranges from size 4 to 11, offering a snug and comfortable fit for women. The chart aligns US shoe sizes with corresponding skate sizes, ensuring accuracy. For example, a US women’s size 7 often corresponds to a Jackson skate size 6.5. Width options, such as narrow, medium, or wide, are also available to accommodate different foot shapes. Proper sizing is crucial for performance, comfort, and preventing discomfort during skating sessions. Always consider both length and width when selecting your size for the best fit. Refer to the measurement guide for precise conversion.

5.3 Children’s Sizing Chart

When selecting Jackson Ice Skates for children, it’s essential to refer to the children’s sizing chart to ensure proper fit and comfort. Children’s feet grow rapidly, so regular resizing is crucial. The chart typically includes sizes based on foot length and width, catering to various age groups. Measurements should be taken accurately to match the correct skate size. Consider the thickness of socks and any growth room needed. Do not guess sizes, as ill-fitting skates can hinder performance and cause discomfort. Use the chart to convert foot measurements to the appropriate skate size, ensuring a snug yet comfortable fit for optimal skating experience. Always consult the official Jackson sizing guide for precise conversions.

How to Choose the Right Jackson Ice Skates

Selecting the right Jackson ice skates involves assessing your skating level, type of skating, and personal comfort preferences. Consider blade type for performance and boot support for stability.

6.1 Understanding Different Models

Jackson Ice Skates offers a variety of models tailored to different skating needs. From recreational to competitive and professional levels, each model is designed to cater to specific skating styles and preferences. The differences often lie in blade quality, boot construction, and overall support. For example, higher-end models may feature advanced materials for improved performance, while entry-level skates prioritize comfort and ease of use. Understanding these distinctions is crucial for selecting the right pair, as it directly impacts skating experience and fit. By matching your skating level and goals to the appropriate model, you can ensure optimal performance and comfort on the ice. Always consider your skating frequency and personal preferences when exploring the range of Jackson Ice Skates models.

6.2 Blade Type and Its Impact on Fit

The blade type significantly influences the fit and performance of Jackson Ice Skates. Different blade types, such as regular, premium, or specialized blades, vary in edge quality, blade life, and sharpness. The blade’s length and shape must align with the boot’s fit to ensure proper balance and movement. A blade that is too long or short can affect skating technique and comfort. Additionally, the blade’s stiffness and sharpening pattern should match the skater’s level and style. Proper blade alignment with the boot ensures optimal performance and prevents discomfort. Choosing the right blade type is crucial for achieving the best fit and skating experience.

6.3 Boot Construction and Support

Jackson Ice Skates feature robust boot construction designed for optimal support and durability. The boots are typically made from high-quality materials, such as leather or synthetic composites, ensuring both flexibility and rigidity where needed. Reinforced ankle areas provide excellent stability, crucial for precise movements and jumps. The boot’s design includes heat-moldable liners, allowing for a customized fit that adapts to the skater’s foot shape over time. Proper support is essential for performance and injury prevention, especially for those engaging in high-impact skating disciplines. The boot’s construction also influences the overall skating experience, offering a balance between comfort and responsiveness. This makes Jackson Ice Skates a preferred choice for both competitive and recreational skaters.

Common Mistakes to Avoid

Common mistakes include ordering incorrect sizes, ignoring width preferences, and not considering skate usage. Proper fit is crucial for performance and comfort.

7.1 Ordering Too Big or Too Small

One of the most common mistakes when purchasing Jackson ice skates is ordering a size that is either too big or too small. Skates that are too big can cause blisters, poor performance, and a lack of control on the ice. Conversely, skates that are too small can lead to discomfort, restricted movement, and even injuries. Proper sizing is crucial for both comfort and performance. Always use the official sizing chart and consider personal fit preferences. If unsure, consult a professional fitter or try skates on in person. Remember, a proper fit ensures optimal performance and reduces the risk of discomfort or injury during skating sessions.

7.2 Ignoring Width and Fit Preferences

Ignoring width and fit preferences is a common mistake that can lead to discomfort and poor performance. Jackson Ice Skates offer various widths to accommodate different foot shapes, but failing to consider this can result in a tight or sloppy fit. A proper fit ensures optimal support, stability, and mobility. Narrow skates may cause pressure points, while overly wide skates can reduce control. Skaters with wider feet often benefit from models designed for comfort fit, while narrower feet may prefer standard or slim widths. Always prioritize trying skates on and paying attention to how they feel. Personal comfort and skating style should guide your width preference to enhance performance and enjoyment on the ice.

7.3 Not Considering Skate Usage

One of the most common mistakes when selecting Jackson ice skates is not considering how they will be used; Different skating activities, such as figure skating, hockey, or recreational skating, require different features in a skate. For example, figure skates need a stronger blade for jumps, while hockey skates prioritize agility and maneuverability. Ignoring these differences can lead to poor performance or discomfort. It’s essential to match the skate model to your primary skating activity to ensure optimal fit, support, and functionality. Jackson offers various models tailored to specific skating needs, so understanding your usage helps in making the right choice. Always consider your skating style and frequency to avoid compromising on comfort and performance.

Breaking in Your Jackson Ice Skates

Breaking in Jackson Ice Skates ensures optimal comfort and performance. Gradual wear, heat molding, and stretching are common methods to achieve a perfect fit and reduce discomfort.

8.1 Initial Fit and Feel

The initial fit and feel of Jackson Ice Skates are crucial for comfort and performance. When trying them on, ensure a snug fit with support around the heel and ankle. The boot should feel firm but not overly tight, allowing toes to wiggle slightly. Pressure points may indicate improper sizing. Skates typically feel stiffer when new, softening as they break in. Pay attention to how the boot conforms to your foot shape. A proper fit minimizes discomfort and enhances skating efficiency. If the fit feels off, consider heat molding or adjustments. Remember, initial stiffness is normal, and skates will adapt to your feet over time. Proper fit ensures optimal performance and comfort.

8.2 Stretching and Molding Options

Stretching and molding options for Jackson Ice Skates allow skaters to achieve a more personalized fit. Heat molding is a popular method, where the boot is heated in a skate oven or with a heat gun to make the material pliable. This process can be done by professionals or at home with caution. Manual stretching can also be effective for minor adjustments, targeting specific areas like the toe box or ankle. Additionally, some skates feature moldable materials that conform to the foot over time. These options ensure a snug, comfortable fit, enhancing performance and reducing discomfort. However, care must be taken to avoid over-stretching, which can compromise the boot’s structure and support.

8.3 Tips for a Comfortable Break-In Period

A comfortable break-in period for Jackson Ice Skates ensures optimal performance and reduces discomfort. Start by wearing thin, moisture-wicking socks to minimize blisters. Gradually increase skate usage, beginning with short sessions on the ice or walking around. Use a skate conditioner to soften the leather and improve flexibility. Consider heat molding for a customized fit, but follow the manufacturer’s instructions carefully. Avoid tight lacing initially, as this can restrict movement and cause pressure points. Stretching exercises before and after skating can also help ease the break-in process. Most importantly, be patient, as proper molding takes time. Monitor for any discomfort and adjust as needed for a seamless skating experience.

Caring for Your Jackson Ice Skates

Proper maintenance ensures longevity and performance. Regular cleaning, storing correctly, and replacing worn parts are essential for keeping your skates in optimal condition.

9.1 Cleaning and Maintenance Tips

Regular cleaning and maintenance are essential to extend the life of your Jackson Ice Skates. After each use, wipe the blades with a soft, dry cloth to remove dirt and moisture. Avoid using harsh chemicals, as they can damage the steel. For the boot, gently clean the exterior with a mild soap solution and a soft-bristle brush. Allow the interior to air dry after skating to prevent bacteria growth. Store your skates in a cool, dry place, away from direct sunlight. Use a protective bag to shield them from dust. Sharpen the blades periodically to maintain performance, and ensure proper fit by avoiding extreme heat or cold exposure. Consistent care enhances comfort and durability.

9.2 Storing Your Skates Properly

Proper storage of your Jackson ice skates is essential to maintain their quality and performance. After use, clean the blades with a soft cloth to remove dirt and moisture. Allow the skates to air-dry completely before storing them in a cool, dry place. Avoid extreme temperatures, as they can damage the materials. Store the skates in their original box or a protective bag to shield them from dust and potential impacts. Keep the laces loosened to prevent creasing and maintain the shape of the boot. Regularly inspect the skates for signs of wear or damage before storing them. Proper storage ensures your skates remain in excellent condition for years.

9.3 When to Replace Your Skates

Knowing when to replace your Jackson ice skates is crucial for optimal performance and comfort. Look for signs of wear, such as dull or nicked blades, which can hinder skating efficiency. If the boot’s support structure begins to break down or the liner becomes compressed and worn, it’s time for a new pair. Additionally, if your feet have grown or your skating level has advanced, consider upgrading. Even with proper care, skates have a lifespan, and replacing them ensures continued support and performance. Regularly inspect your skates, and don’t hesitate to replace them when these signs arise.

Proper sizing is crucial for optimal performance and comfort. Use this guide to find your perfect fit and enjoy a seamless skating experience with Jackson Ice Skates.

10.1 Final Thoughts on Sizing

Proper sizing is crucial for optimal performance, comfort, and injury prevention in Jackson Ice Skates. Ensuring a precise fit enhances skating efficiency and overall enjoyment. Always refer to the sizing chart and consider factors like foot shape, skating level, and personal comfort preferences. Avoid common mistakes such as ordering sizes too big or too small, as this can hinder performance and lead to discomfort. By following the guidelines and taking accurate measurements, you can find the perfect fit for your skating needs. Remember, a well-fitting skate is an investment in your skating journey, whether you’re a beginner or an advanced skater.

10.2 Encouragement to Try Jackson Skates

Jackson Ice Skates are a trusted choice for skaters worldwide, offering exceptional performance, comfort, and durability. Whether you’re a seasoned athlete or a beginner, Jackson provides a wide range of styles to suit every skating need. With a focus on innovation and quality, their skates are designed to enhance your on-ice experience. By following the sizing guide, you can ensure a perfect fit, maximizing both comfort and performance. Don’t hesitate to explore Jackson’s collection—discover why they are a favorite among skaters of all levels. Experience the difference of skating with confidence and precision, and make your time on the ice truly unforgettable.